Uploading PDFs and Utilizing Smart Mark-Ups in Built Insights
This guide offers a comprehensive overview of how to effectively upload and utilize PDFs with Smart Mark-Ups in Built Insights. It empowers users to enhance their project documentation by enabling editing, tagging equipment, and identifying issues directly on the PDFs. By following the steps outlined, users can streamline their workflow, improve collaboration, and ensure accurate tracking of project details. Viewing this guide will help maximize the potential of Built Insights for better project management.
1. Navigate to the Built Insights landing page

2. Click “Smart Markup”

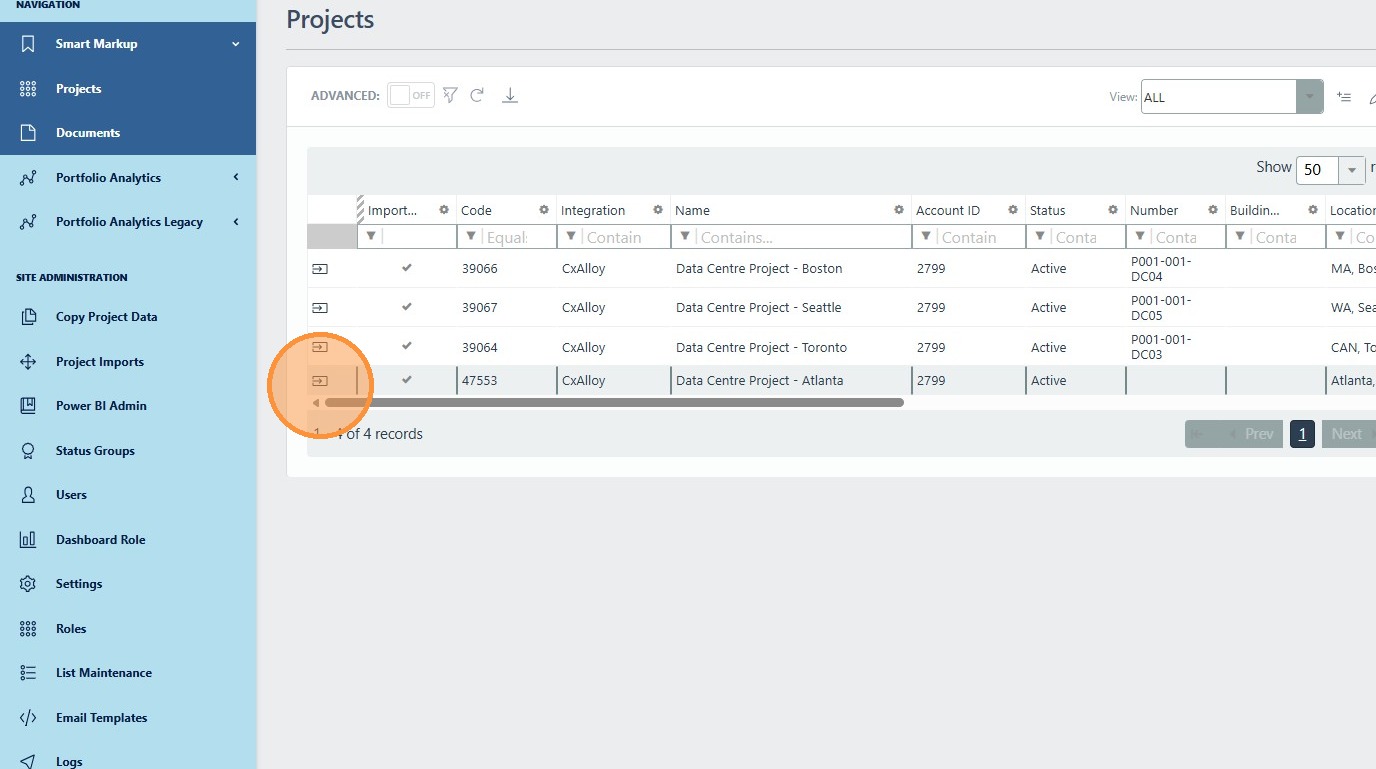
3. Click “Projects”

Upload a PDF to Smart Mark-Ups
4. Select the project where you would like to upload a PDF for utilizing the Smart Mark-Ups Feature
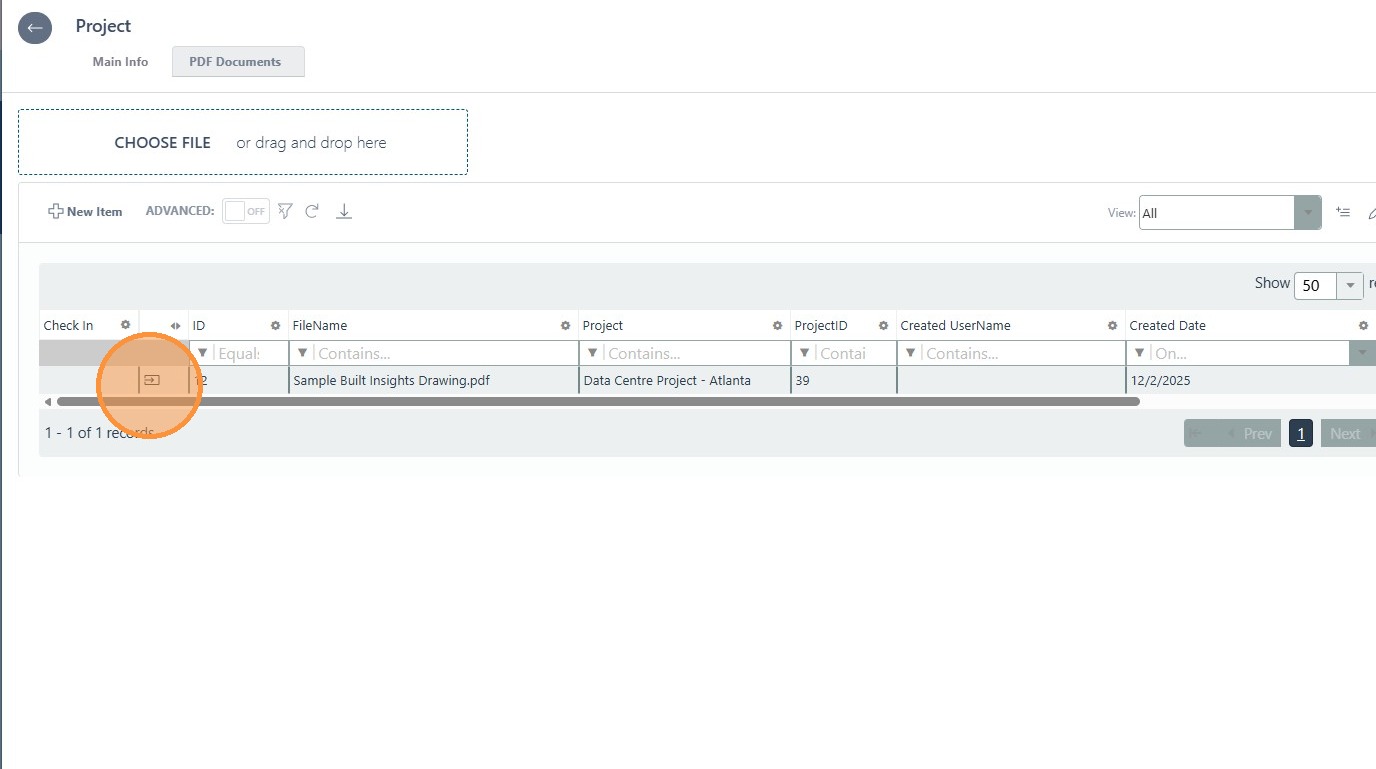
5. Click “PDF Documents” and select the PDF that you would like to import into the Built Insights software to be utilized in the Smart Mark-Ups feature

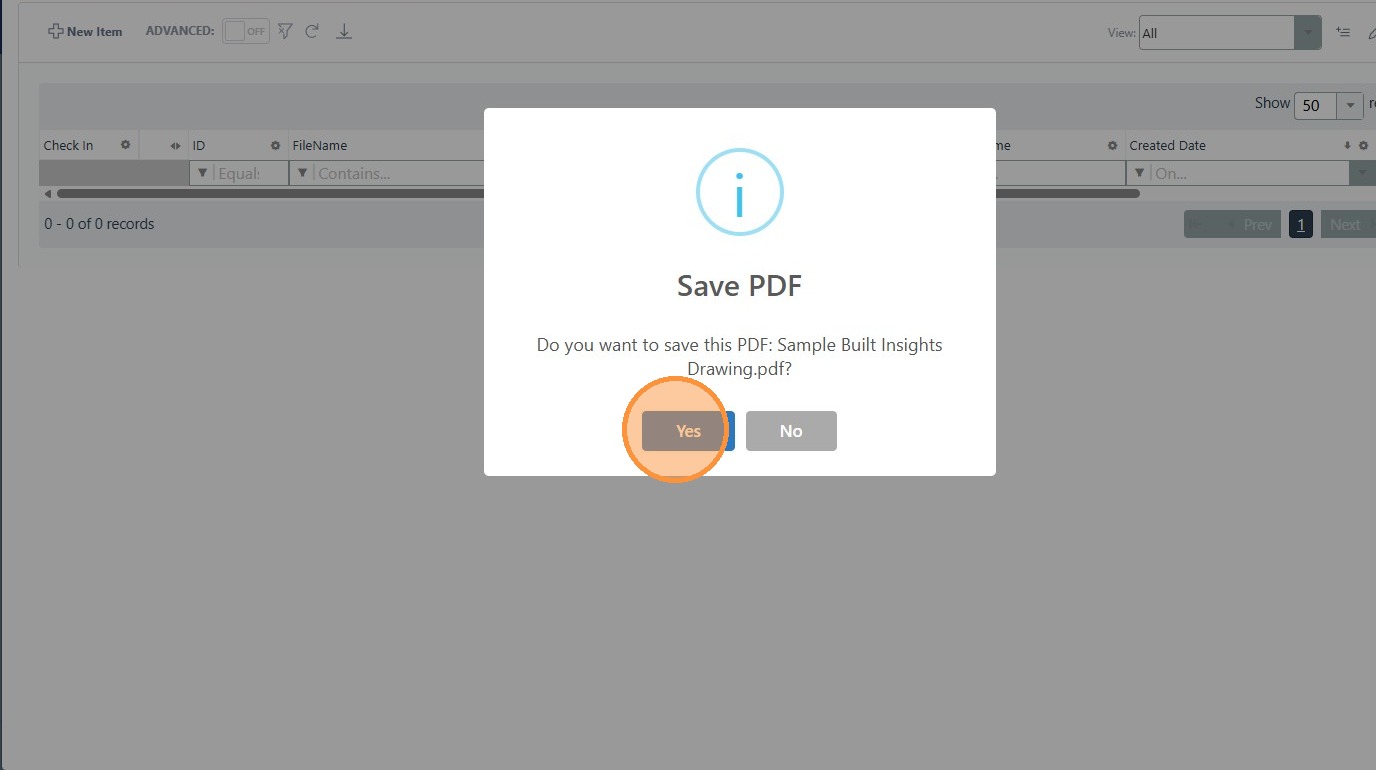
6. Once the document has been uploaded then click “Yes”
7. Click here to access the PDF document
View PDF Document in Smart Mark-Ups
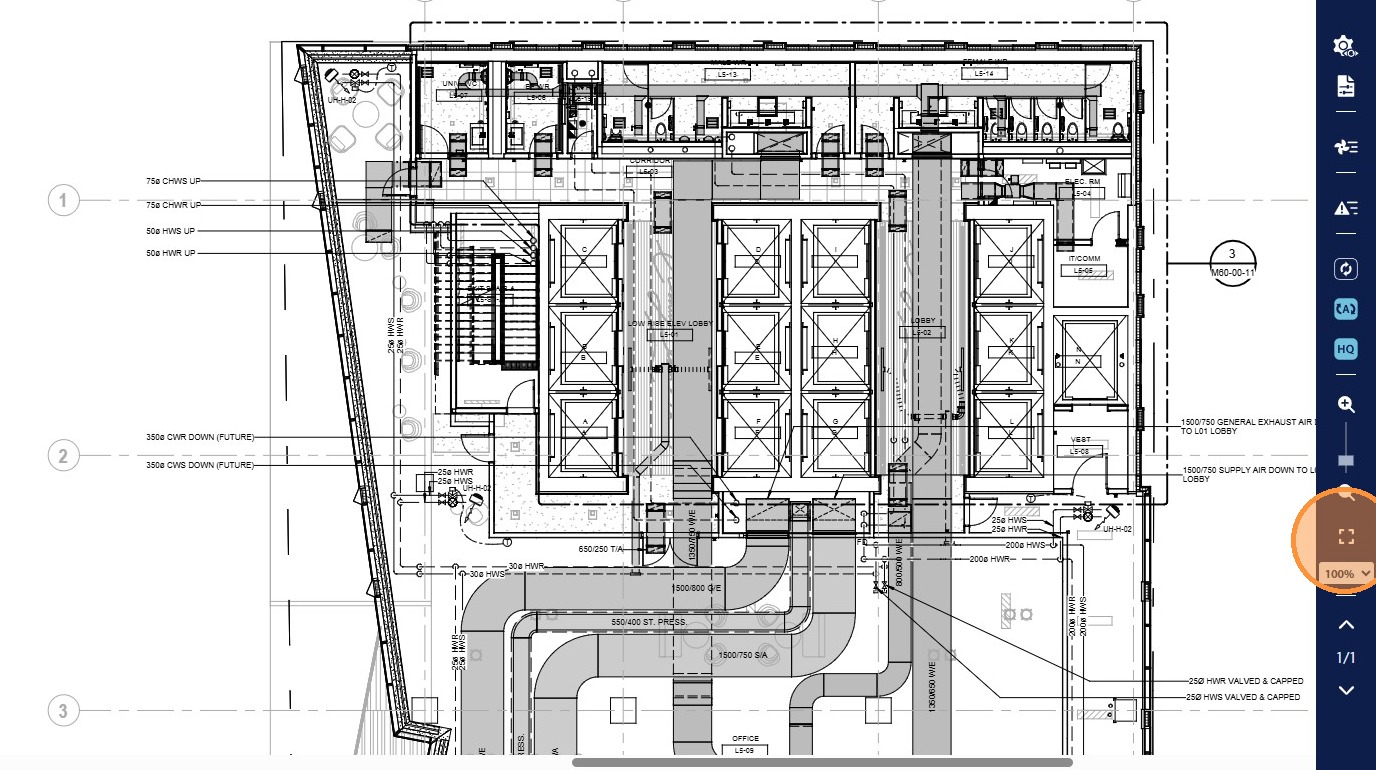
8. Once the PDF has been rendered the user can select the desired Zoom amount to view the document using the Zoom Slider, Zoom Extents icon, or select a specified Zoom Percentage
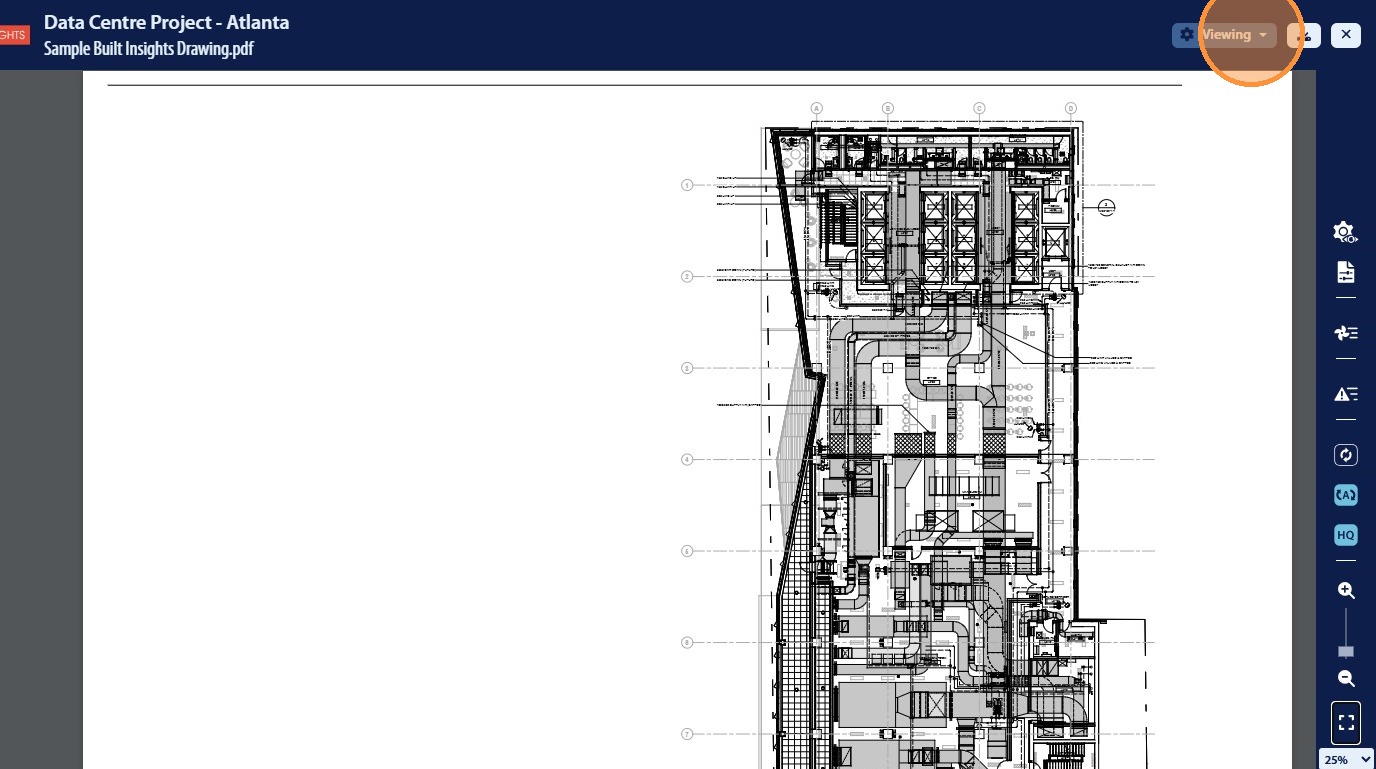
9. The software will default to the “Viewing” mode which allows users to review the document but not add additional information
Edit PDF Document in Smart Mark-Ups
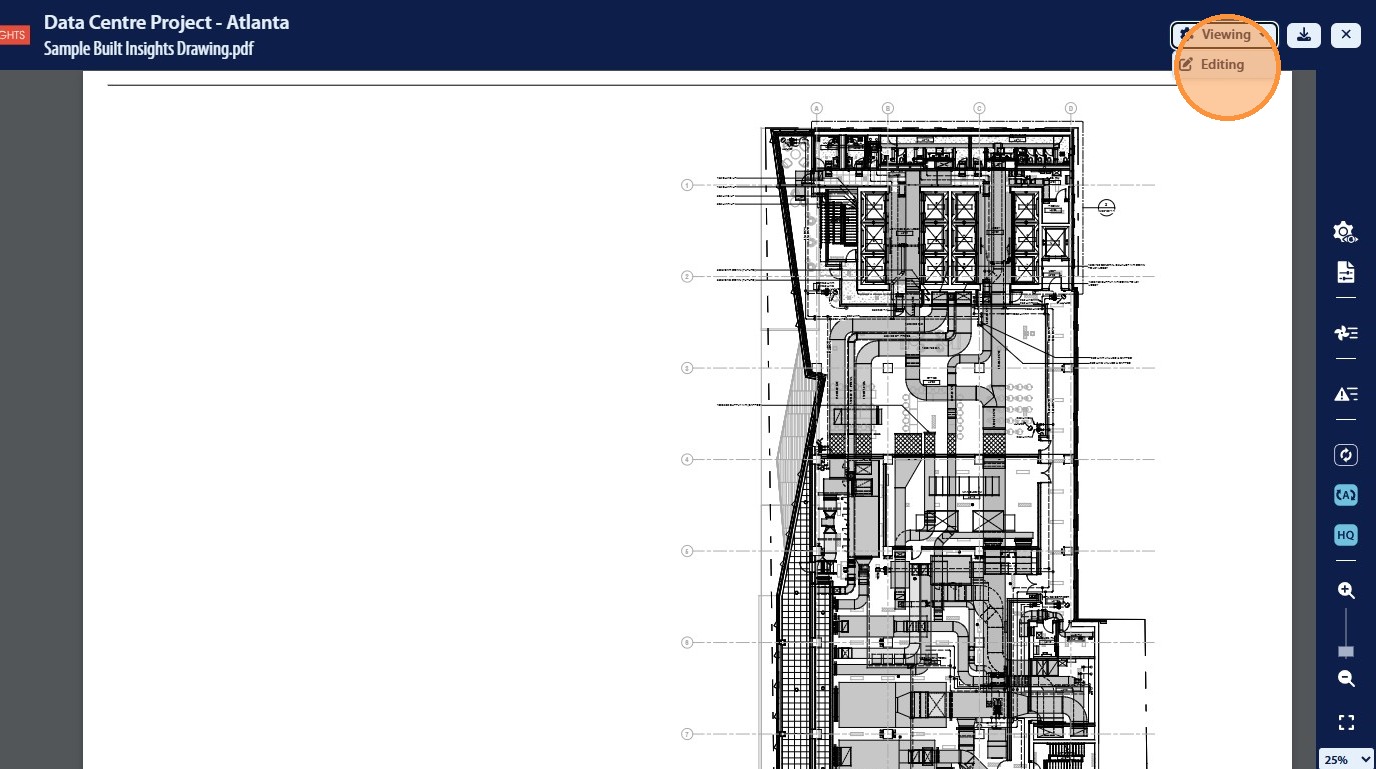
Alert: The ability to edit documentation in the Smart Mark-Ups feature is permission restricted and may need to be applied before the following steps can be completed
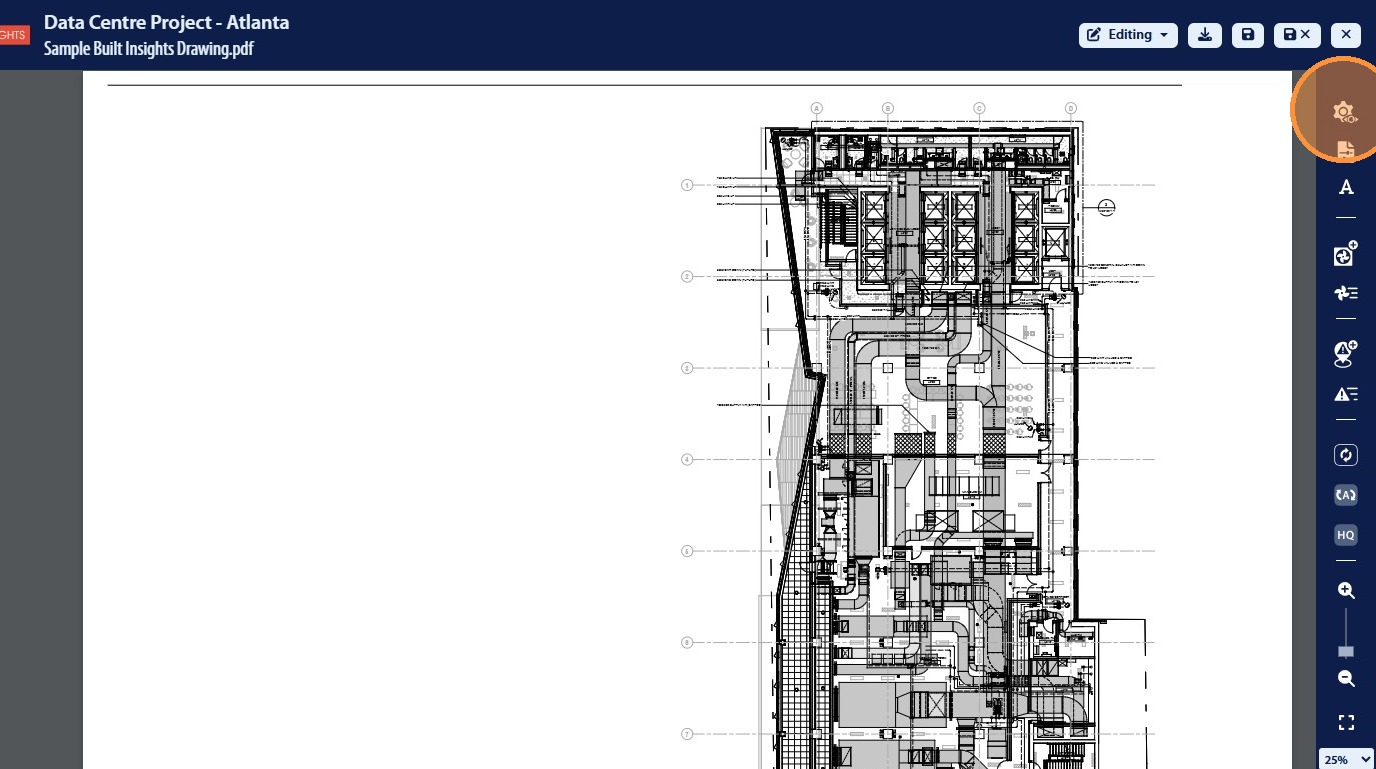
10. For the user to be able to add additional information click “Editing” in the drop down menu
View Settings
11. The user will have the ability to change the information displayed on the page by accessing the View Setting icon
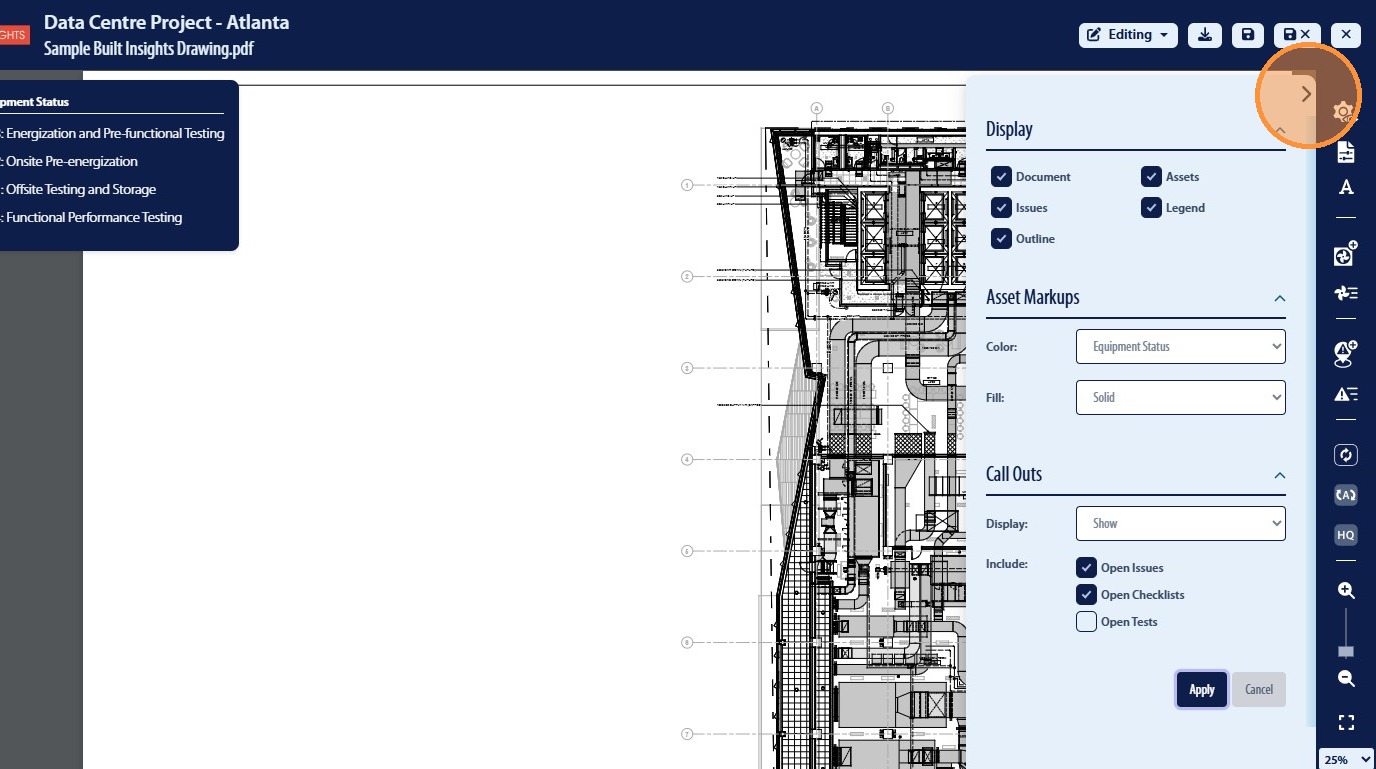
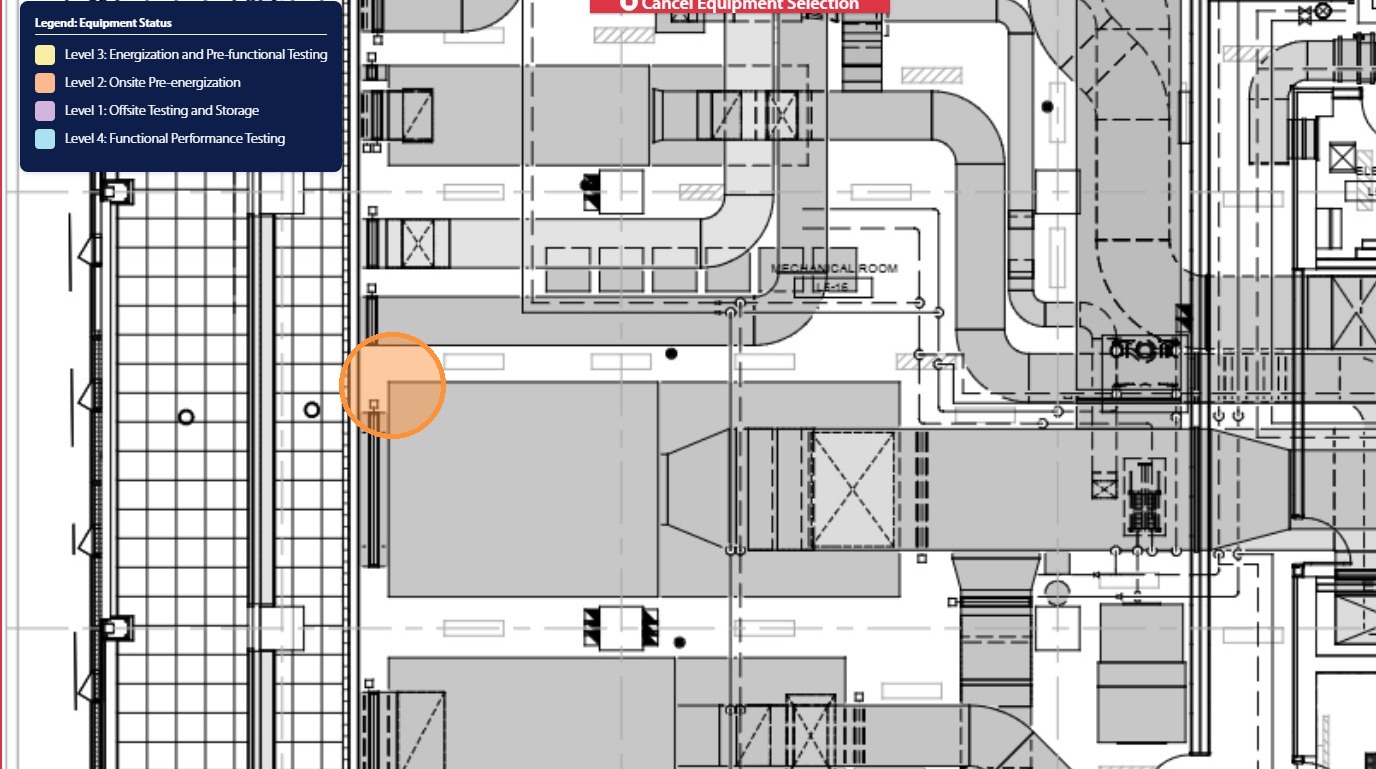
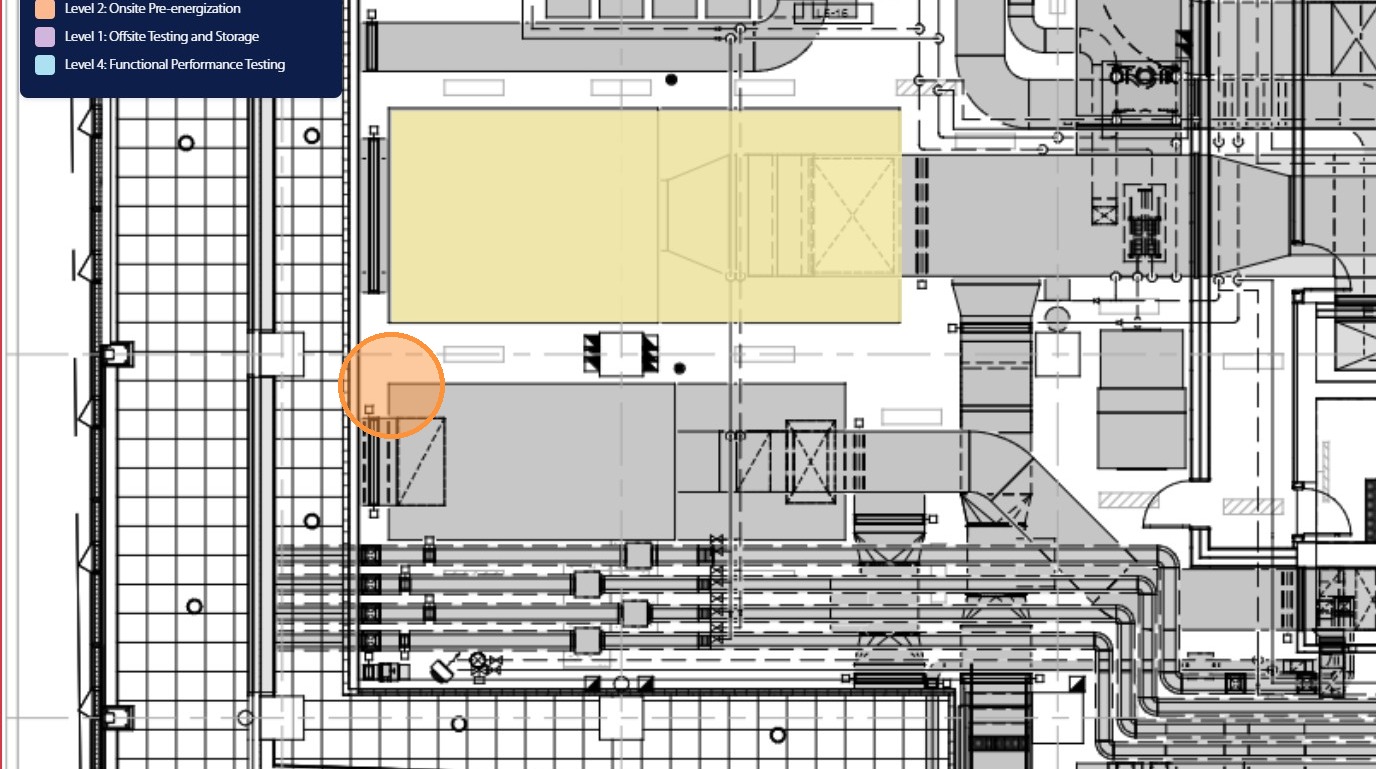
12. From here the user has the ability to adjust the items displayed on the page such as turning on the “Legend”
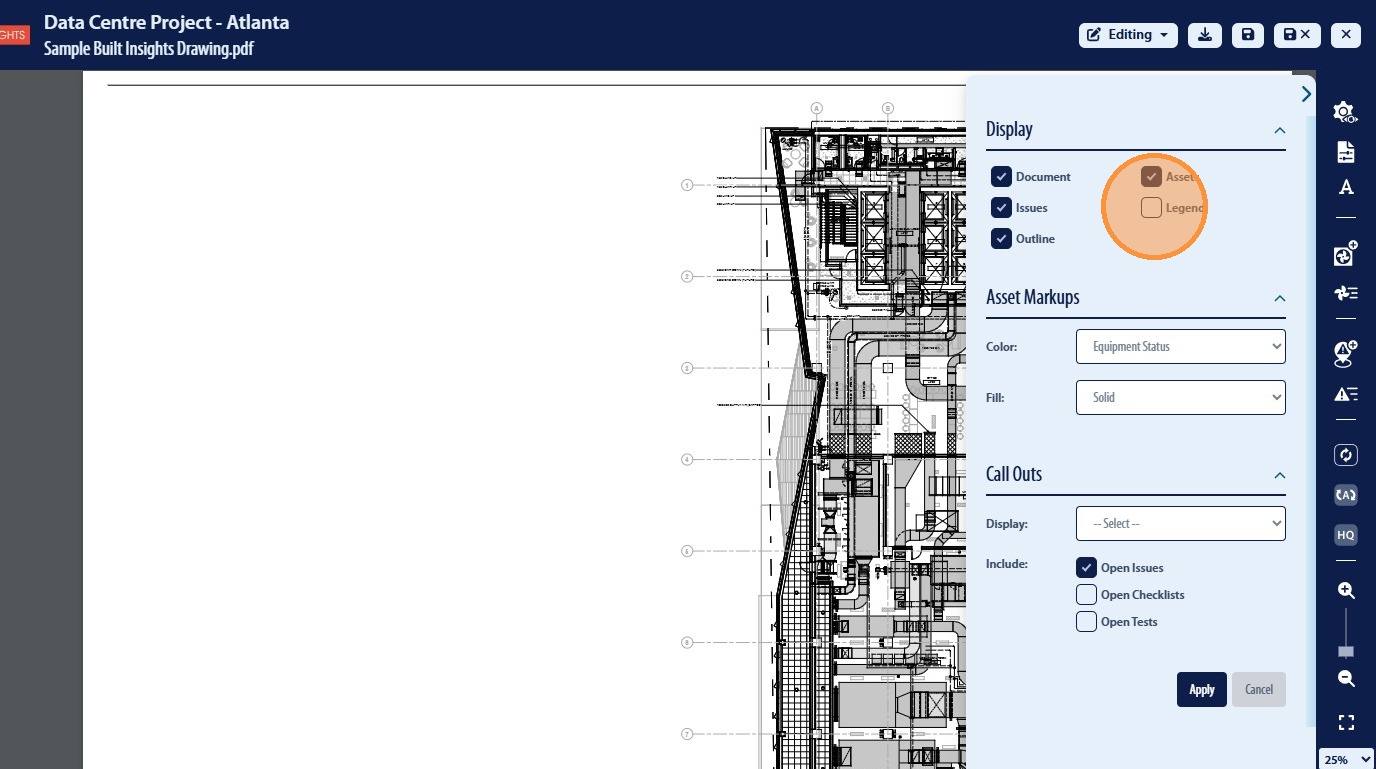
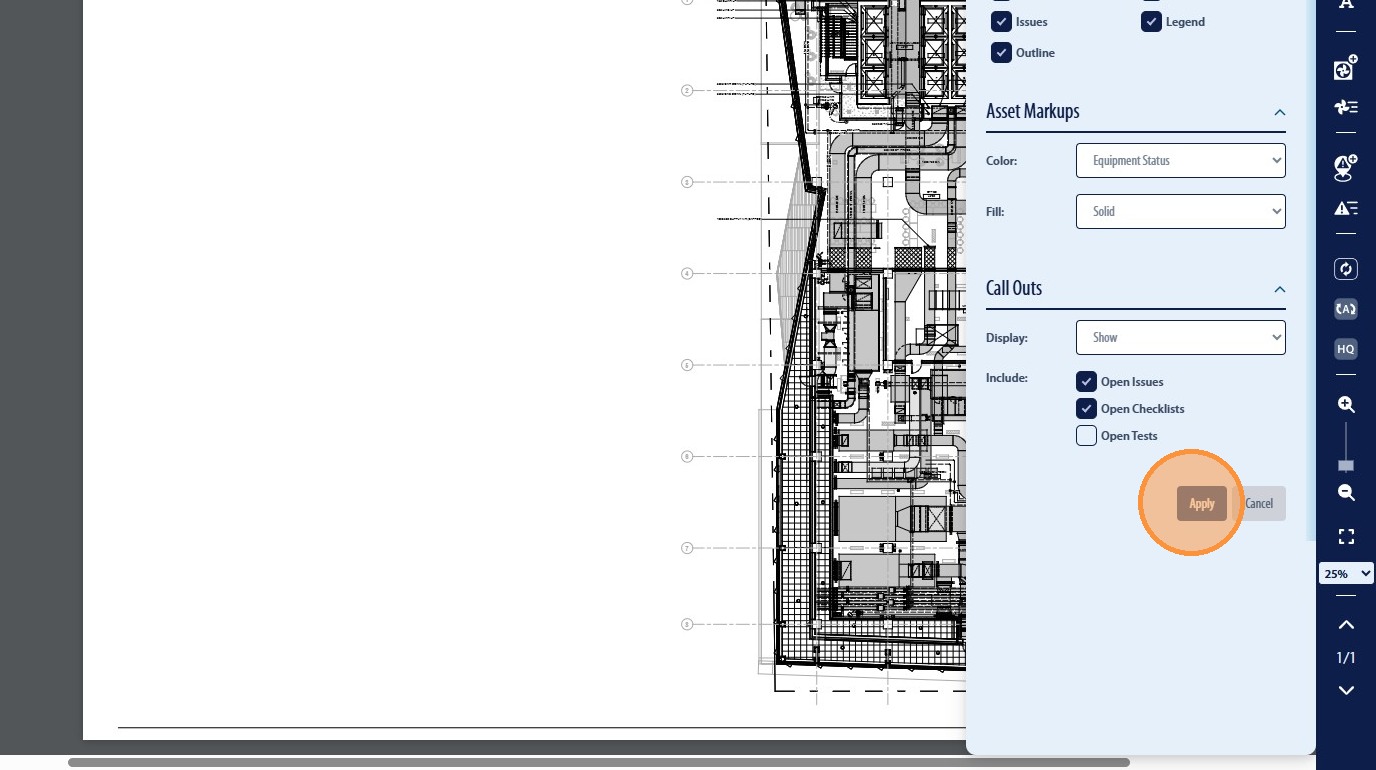
13. Additionally the user has the ability to Display “Call Outs” for items tagged on the PDF as well as select the information that will be displayed in the “Call Outs”
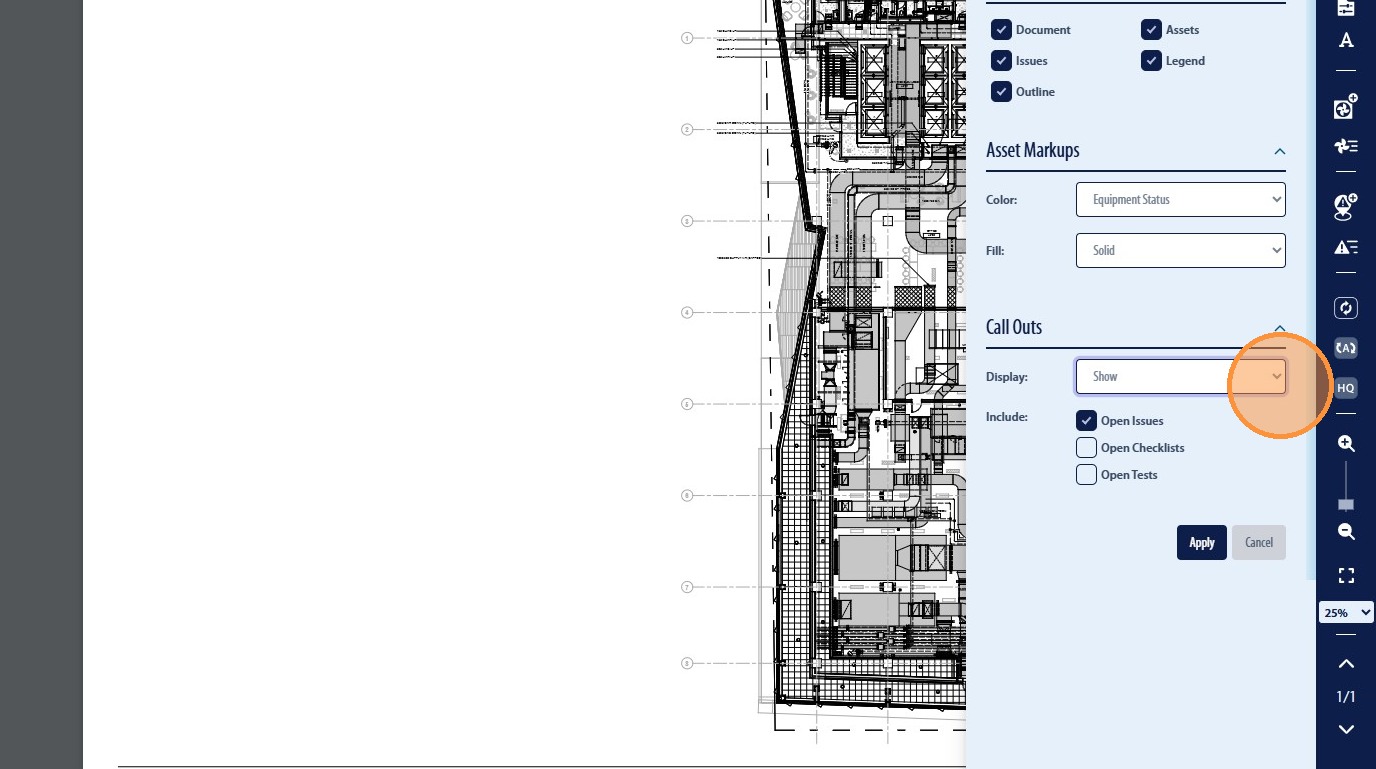
14. Once the user has selected the desired options to display on the PDF they will then be required to click “Apply”
15. This will adjust the overall display for that user
Page Settings
16. The user has the ability to adjust the associated PDF information and link that to CxAlloy related information such as Location data. This can be accessed through the Page Settings icon

17. Asset Call-Outs can be defaulted to show or not show
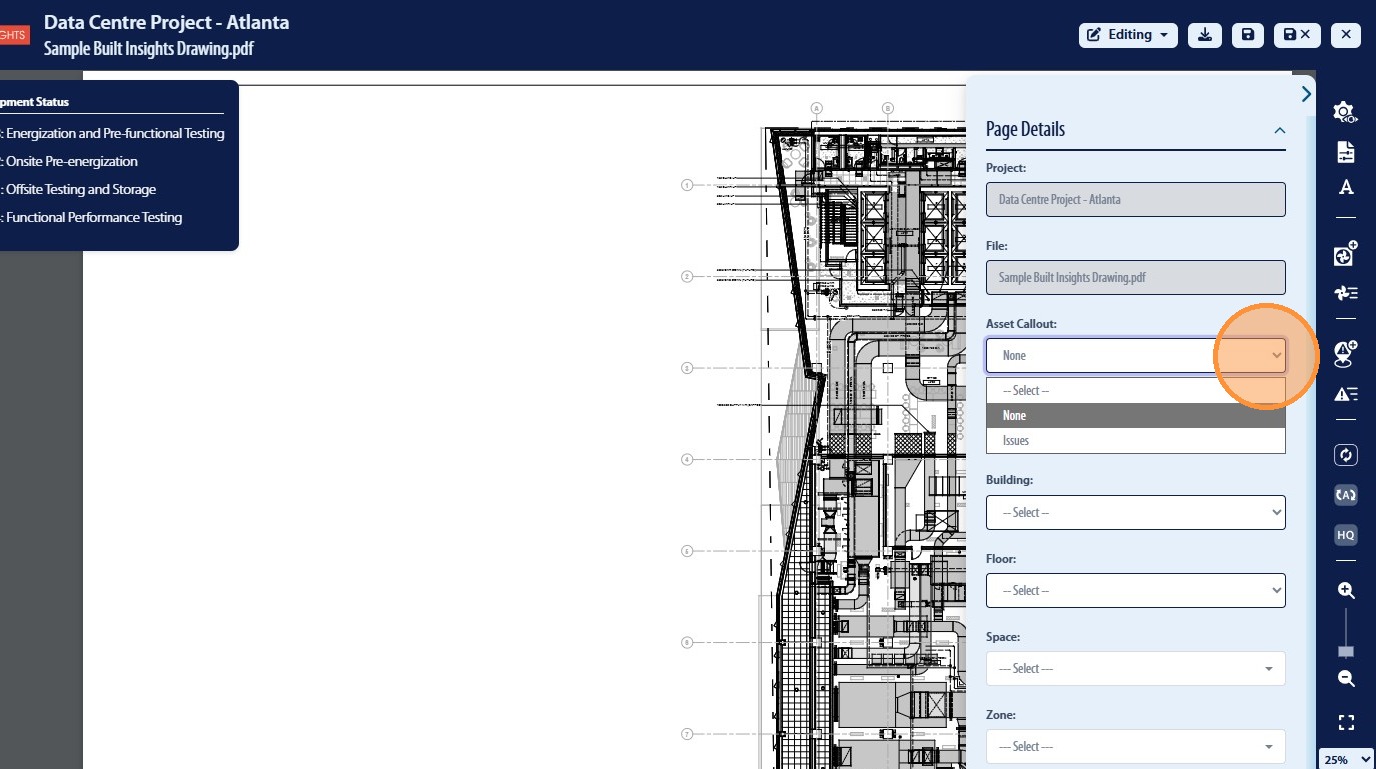
18. Campus data will be dispalyed as a Drop Down List for the user to select
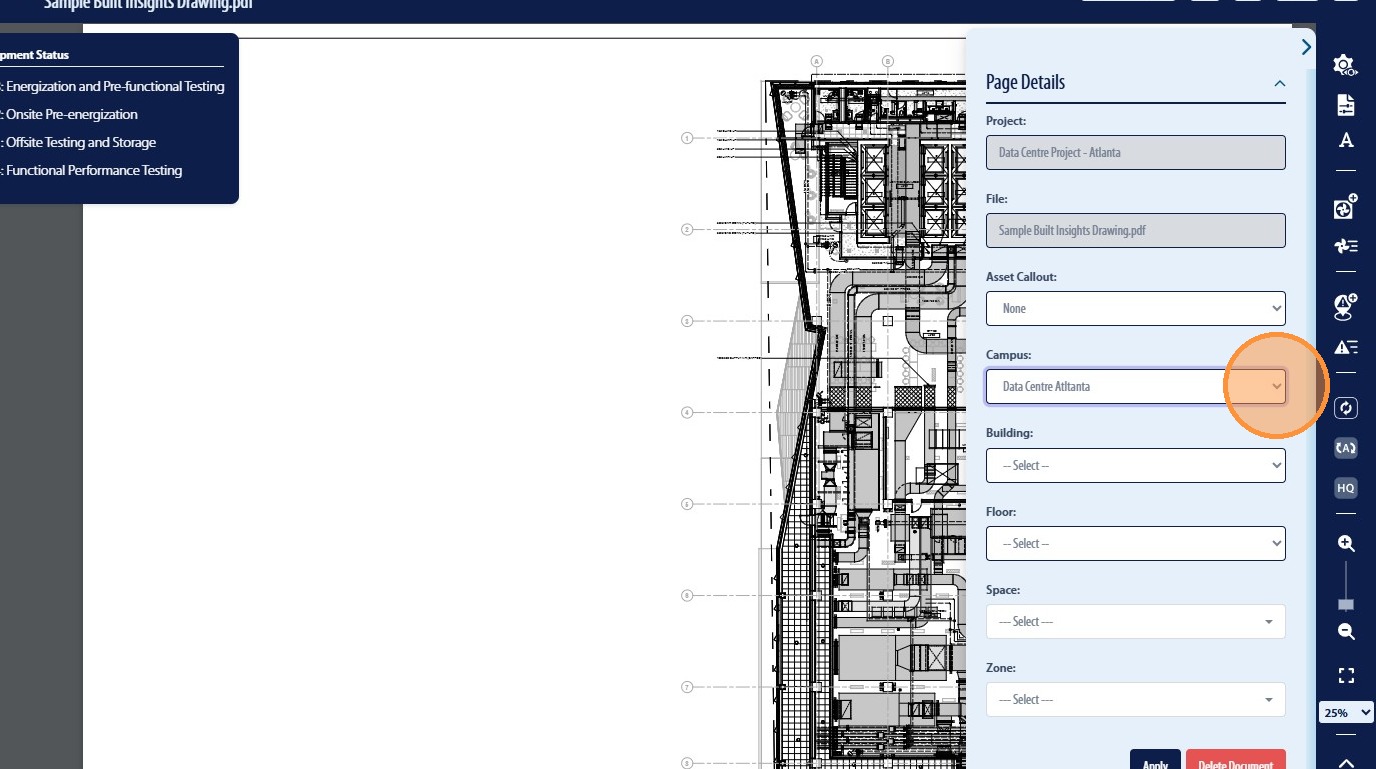
19. Building data will be dispalyed as a Drop Down List for the user to select
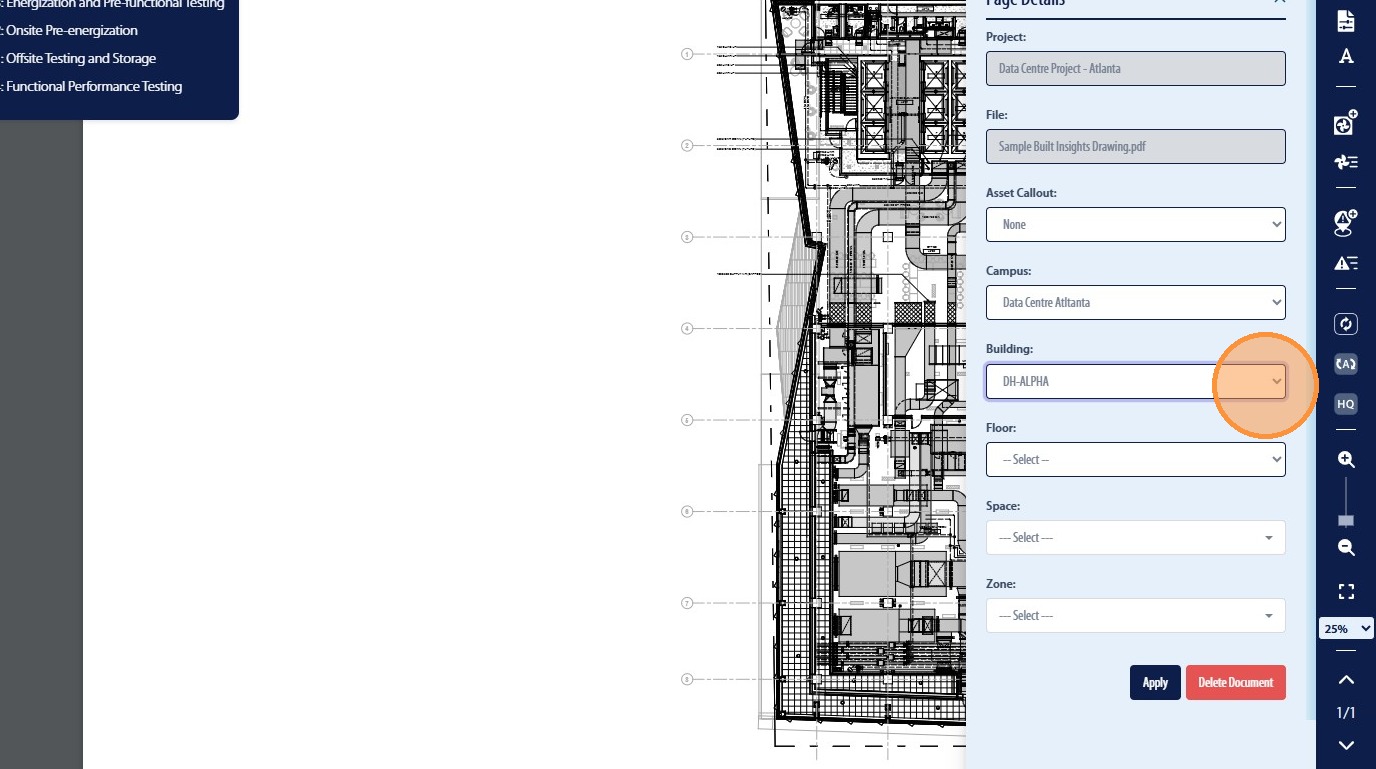
20. Floor data will be dispalyed as a Drop Down List for the user to select
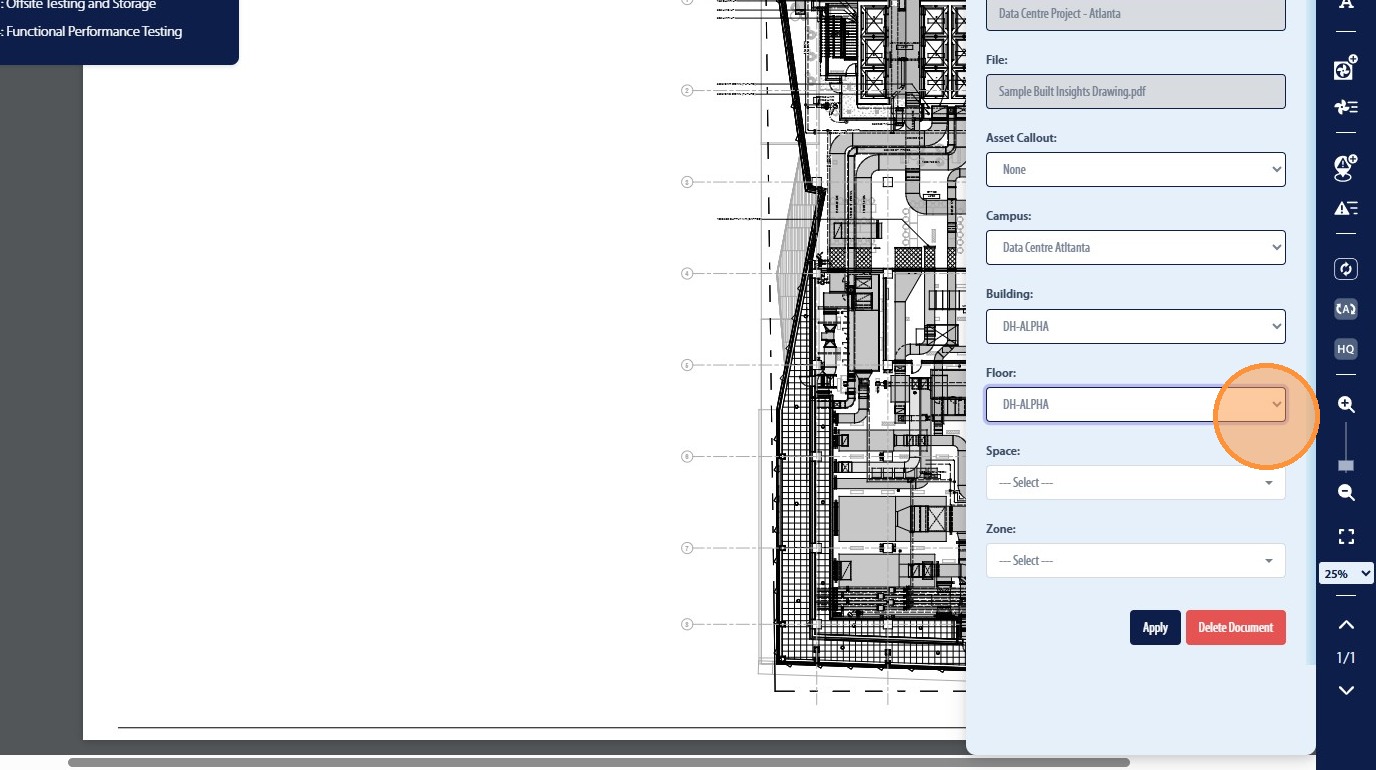
21. Once the user has selected the desired options to be associated with the PDF they will then be required to click “Apply”

Apply Comments & Mark-Ups
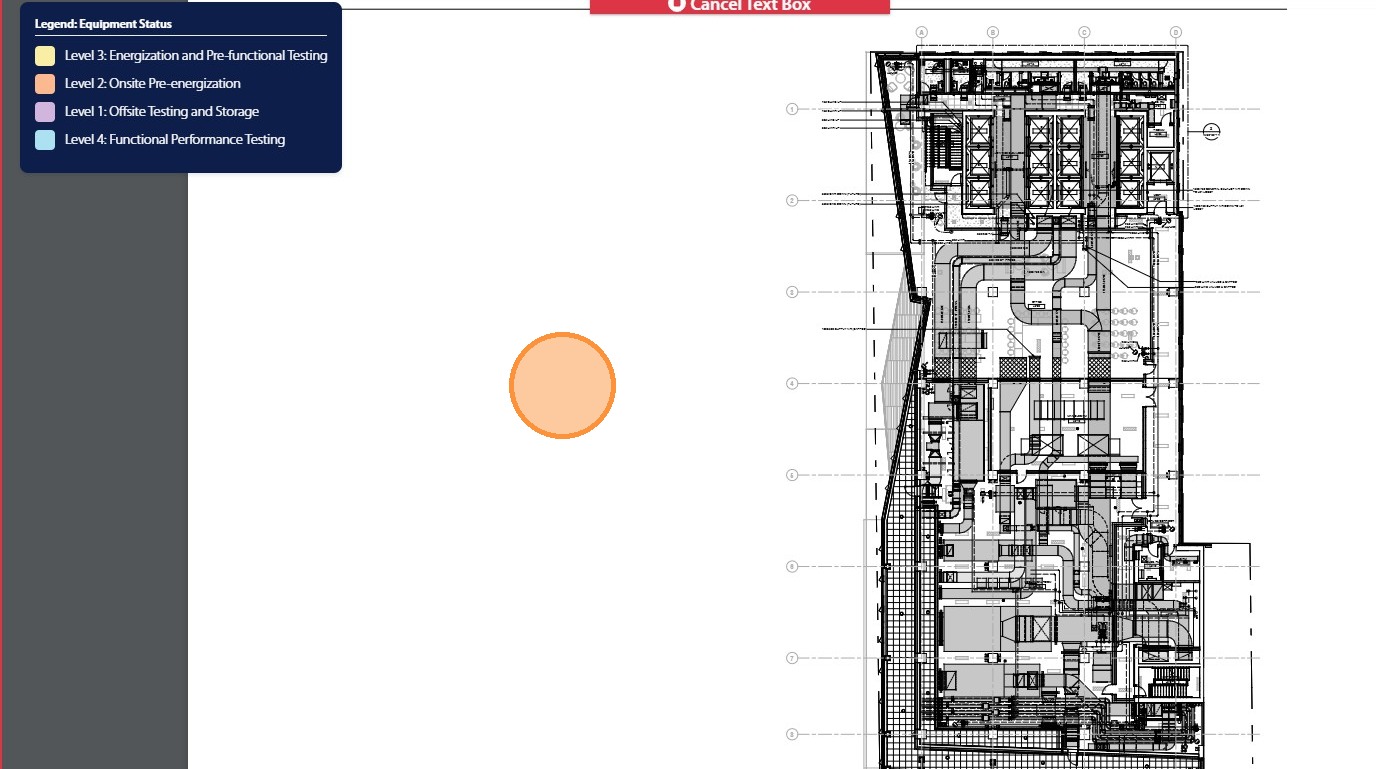
22. The user will have the ability to apply text and text boxes to the PDF in the form of a mark-up by clicking the Add-Text Icon

23. Once Add-Text icon has been selected the user can then click anyone on the PDF document to add Text or Text Boxes
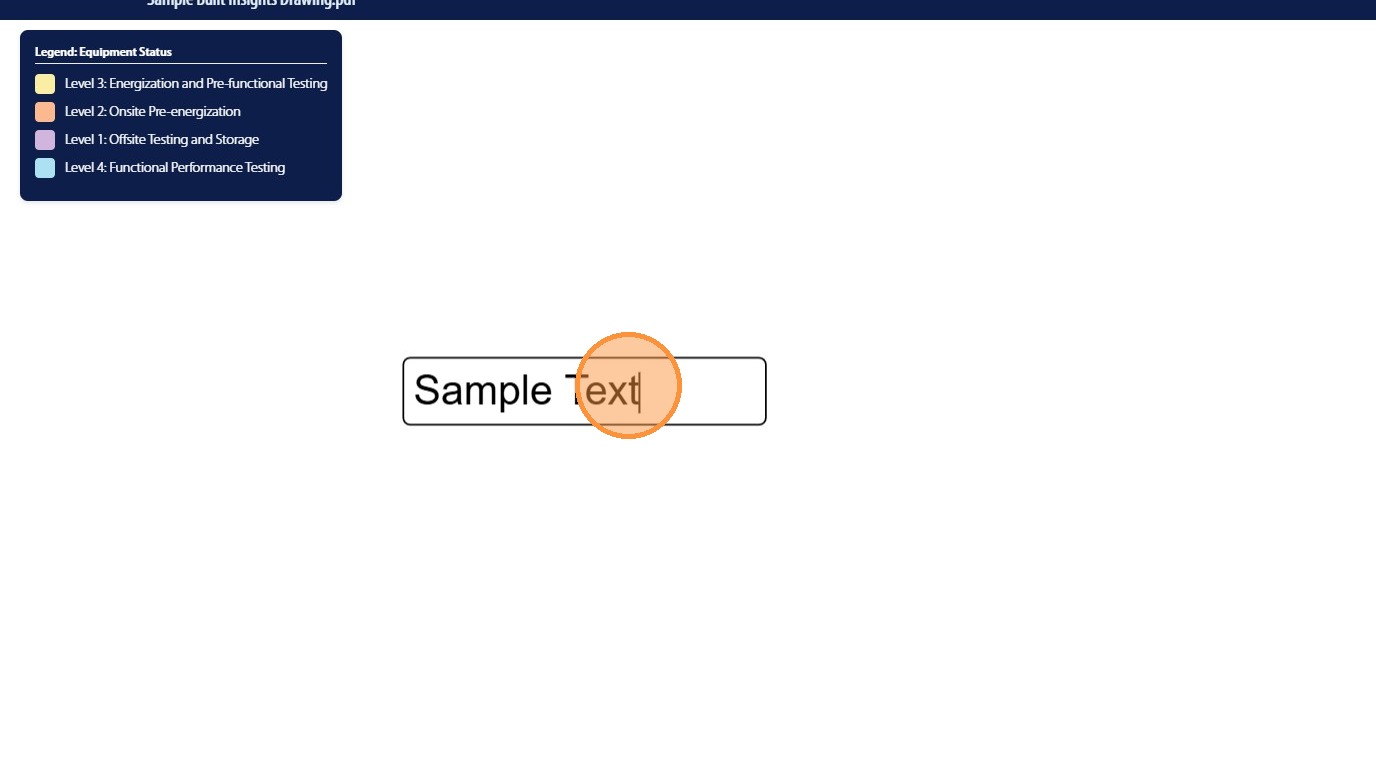
24. The user will be promted to add text as the initial step
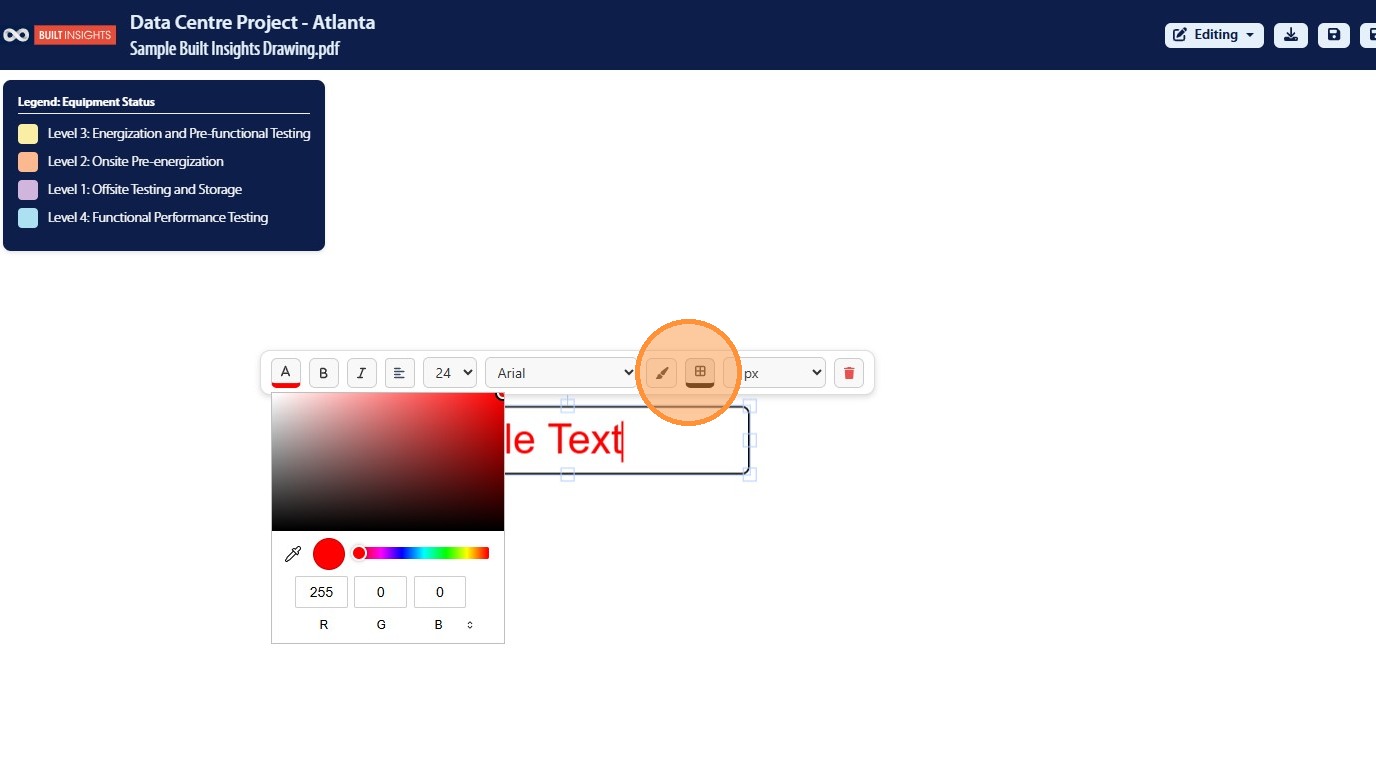
25. Once the user can completed adding text they will be presented with the Text Box editing options such as text color, text size, and text box color

26. Click the text box option buttons to open the color selection options
27. To remove a mark-up the user can click the “Trash” icon

Tag Equipment in Smart Mark-Ups
28. The user can tag equipment from CxAlloy on a PDF in Smart Mark-Ups by using the “Add Equipment” icon
29. Once Add Equipment icon has been selected the user can then click anyone on the PDF document to add an rectangle that will represent a piece of equipment on the PDF
30. Once the rectangle has been drawing on the PDF the user can then select the associated piece of equipment from the equipment list
31. Click the desired piece of equipment
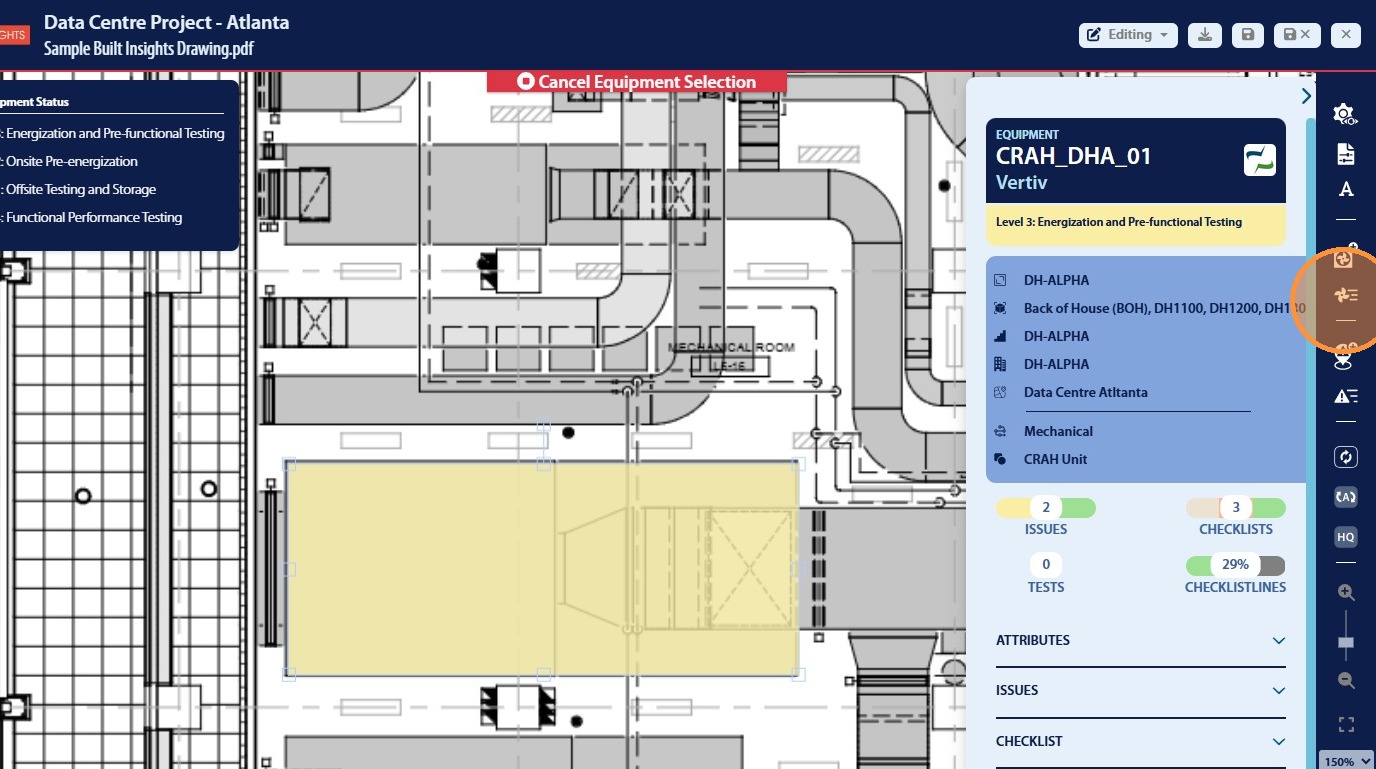
32. This will now populate the data for that piece of equipment such as name, status, discipline, and other associated items from CxAlloy
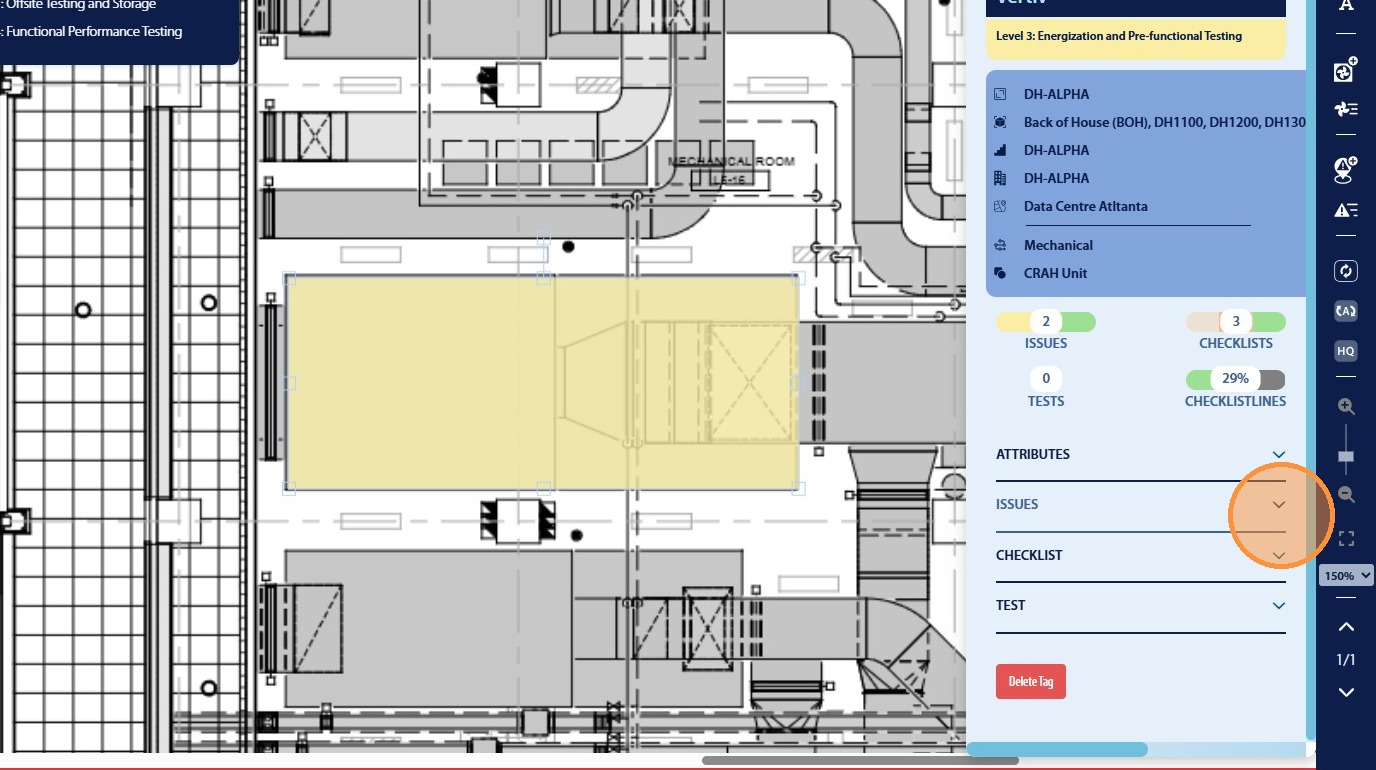
33. The user will have the ability to review associated items by using the arrow to display the information
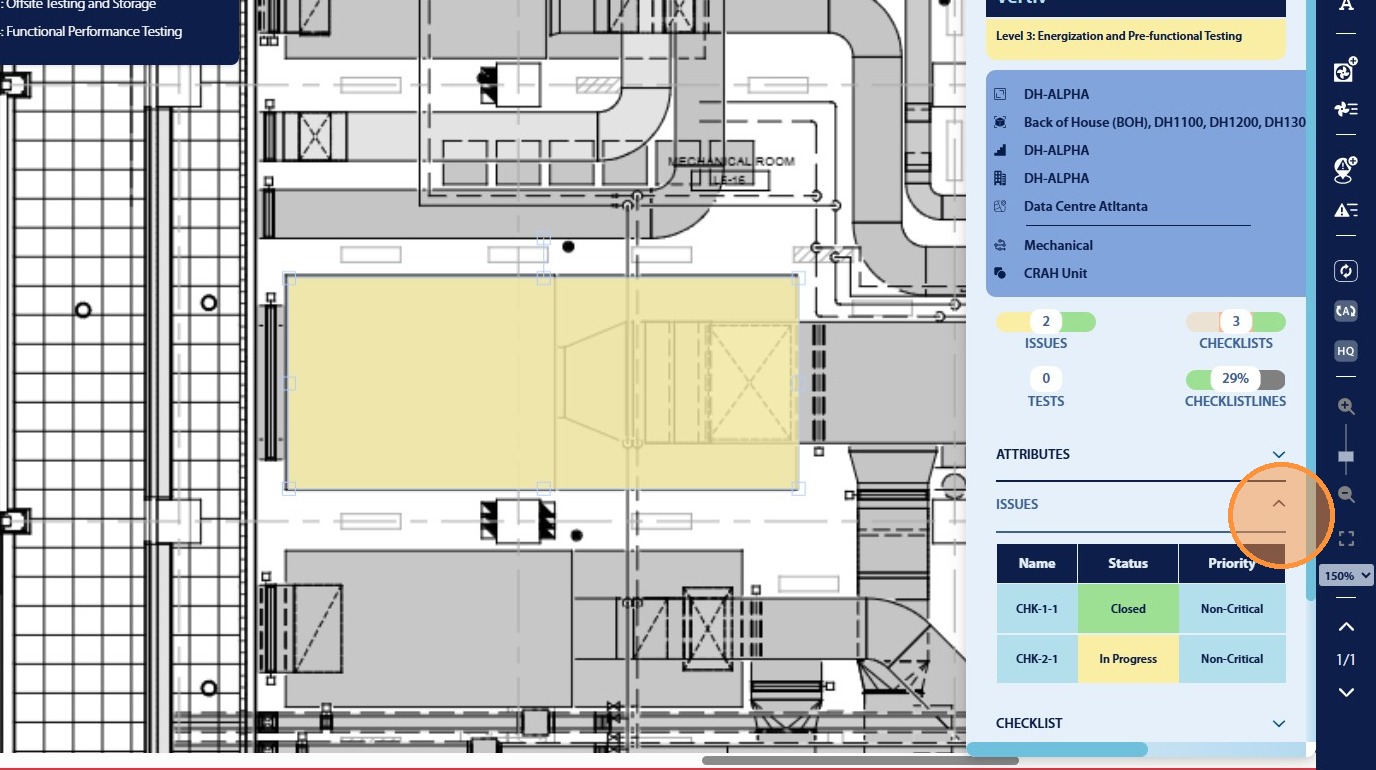
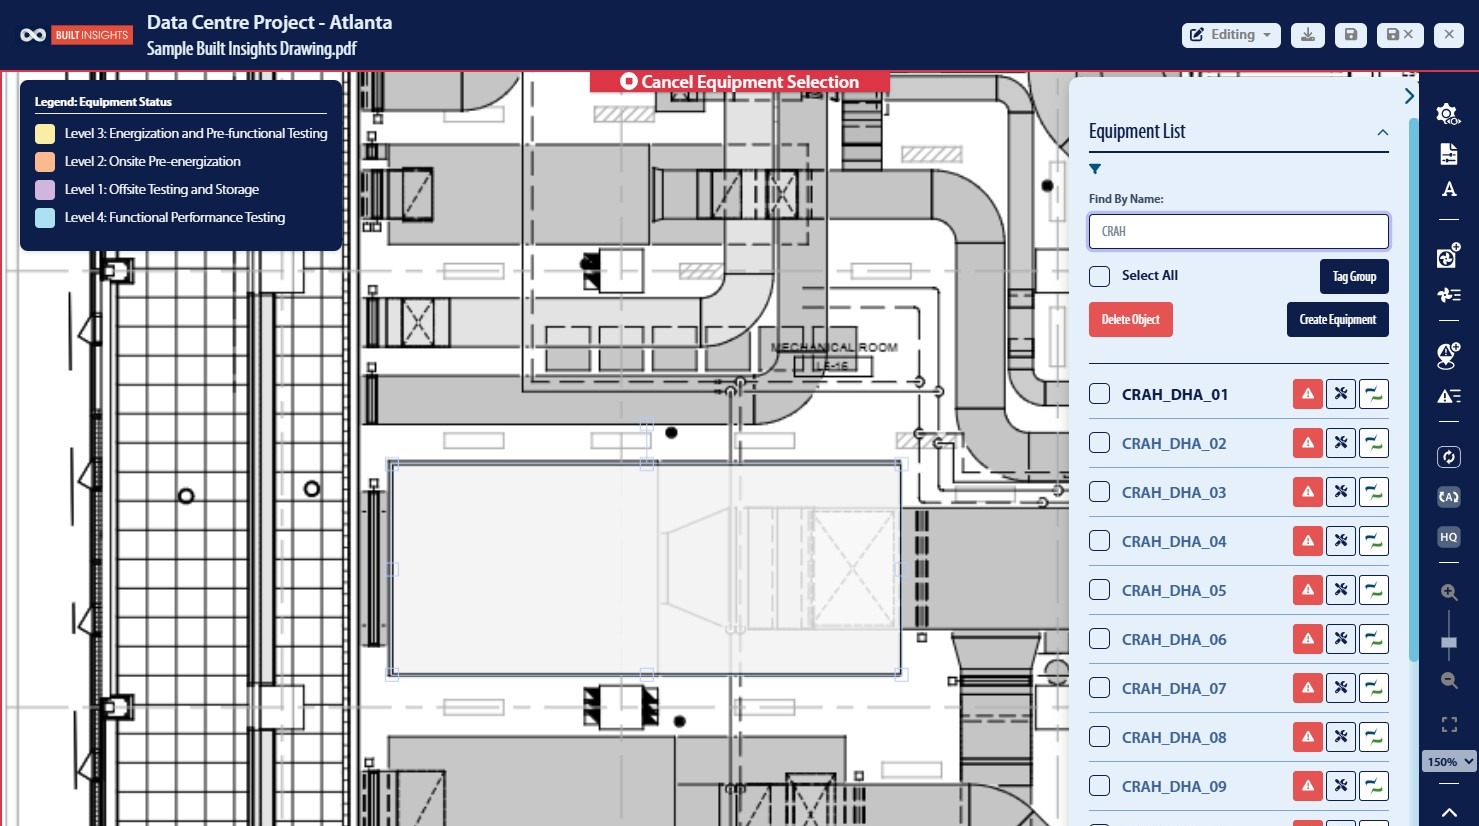
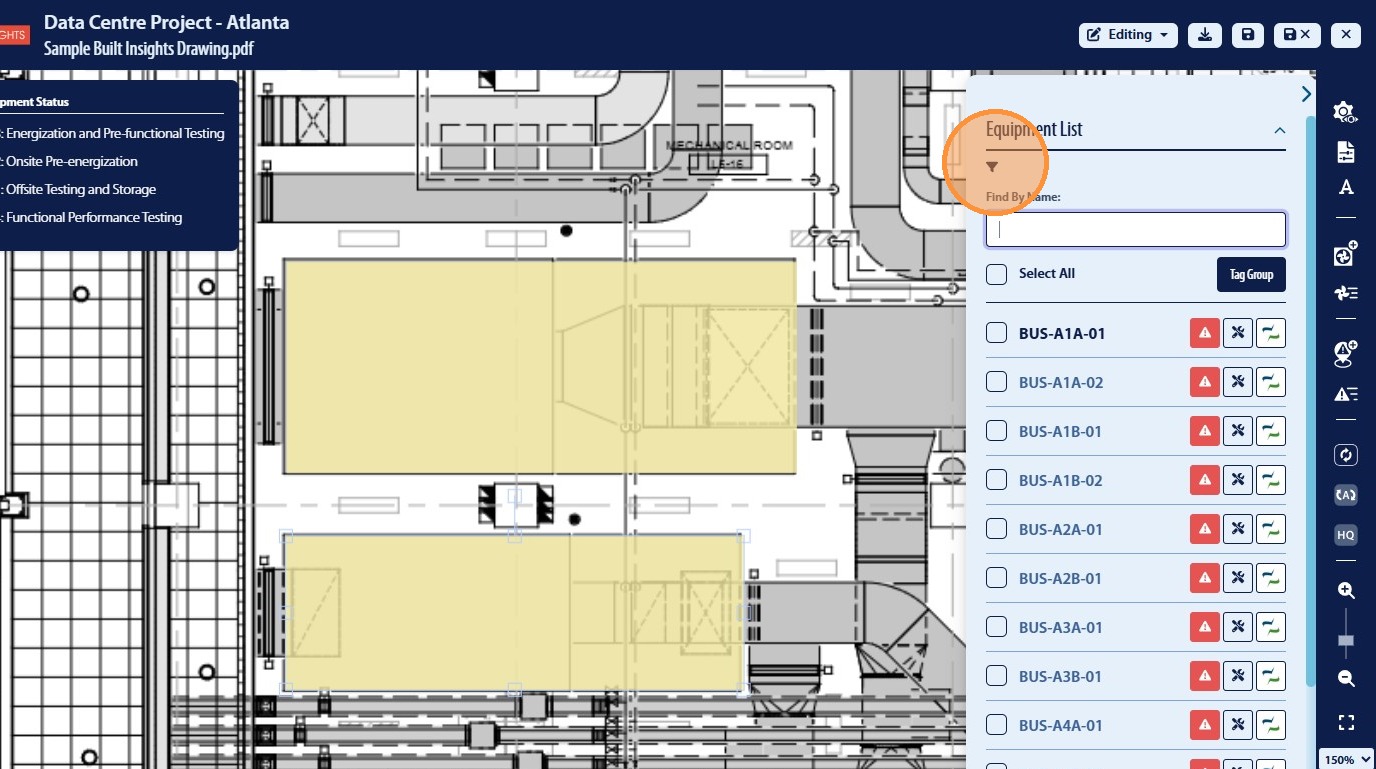
34. Additionally all equipment for the project can be viewed by clicking the Equipment List icon
35. From here the user can use the search bar to find specific equipment
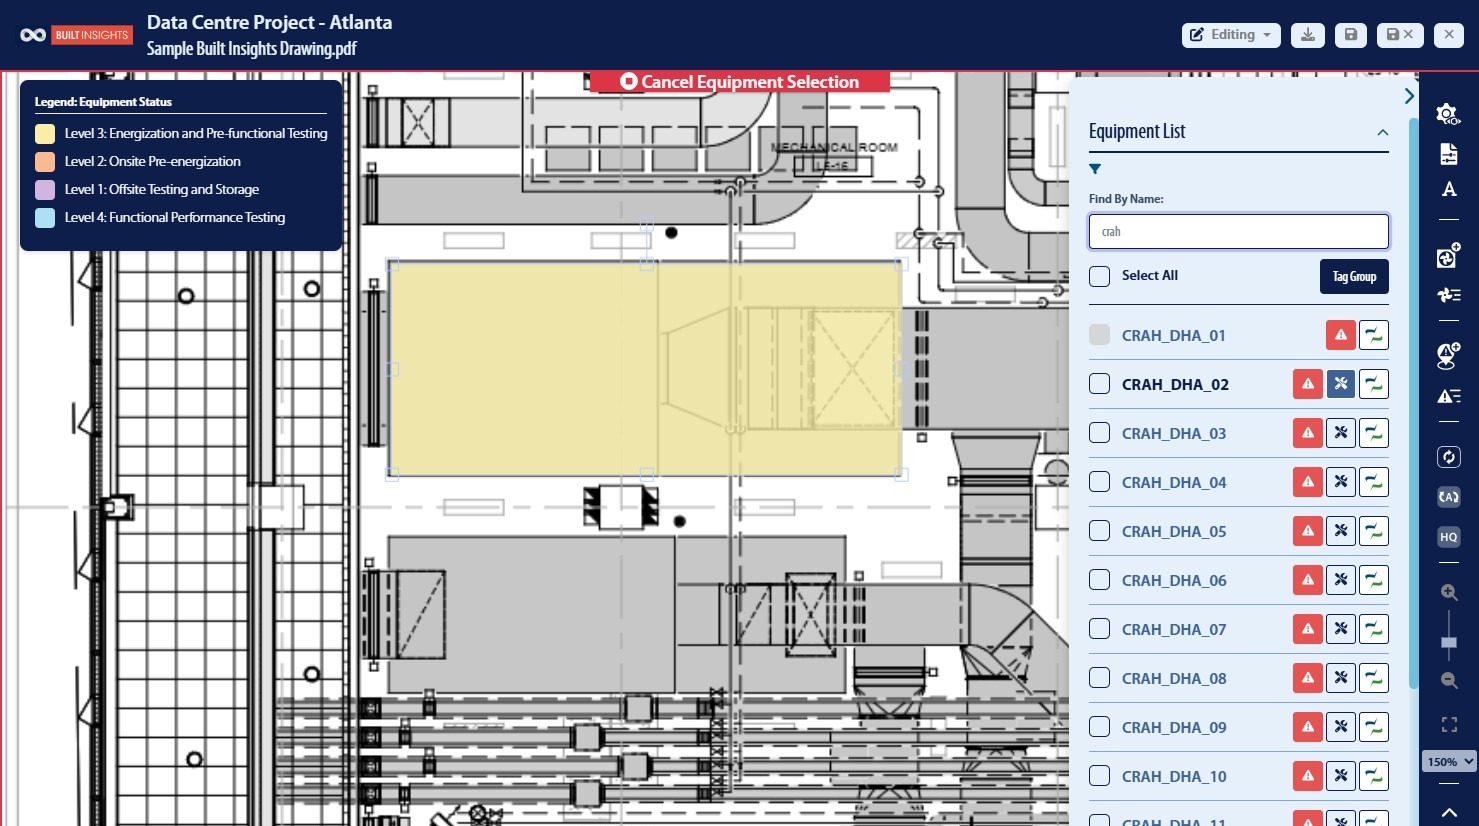
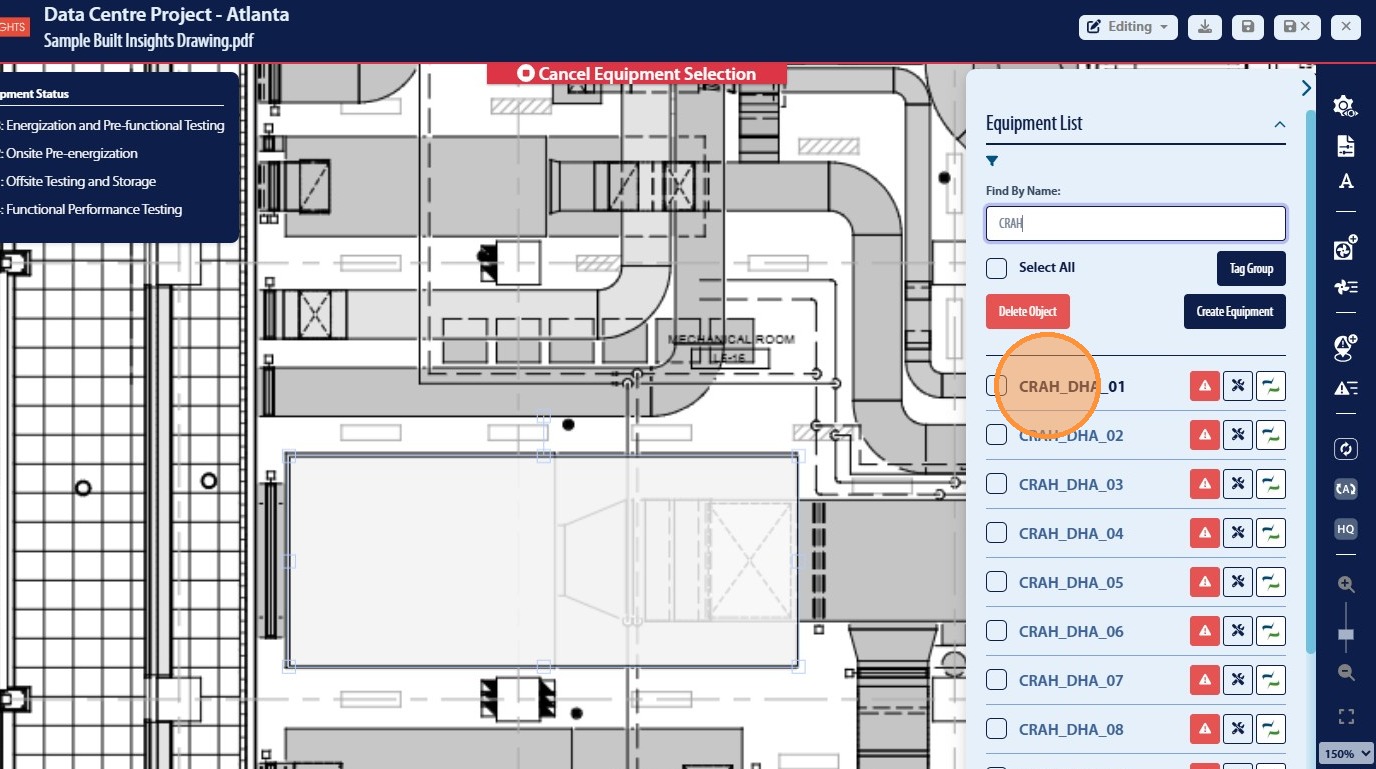
36. To tag a specific equipment on the PDF the user can use the center icon
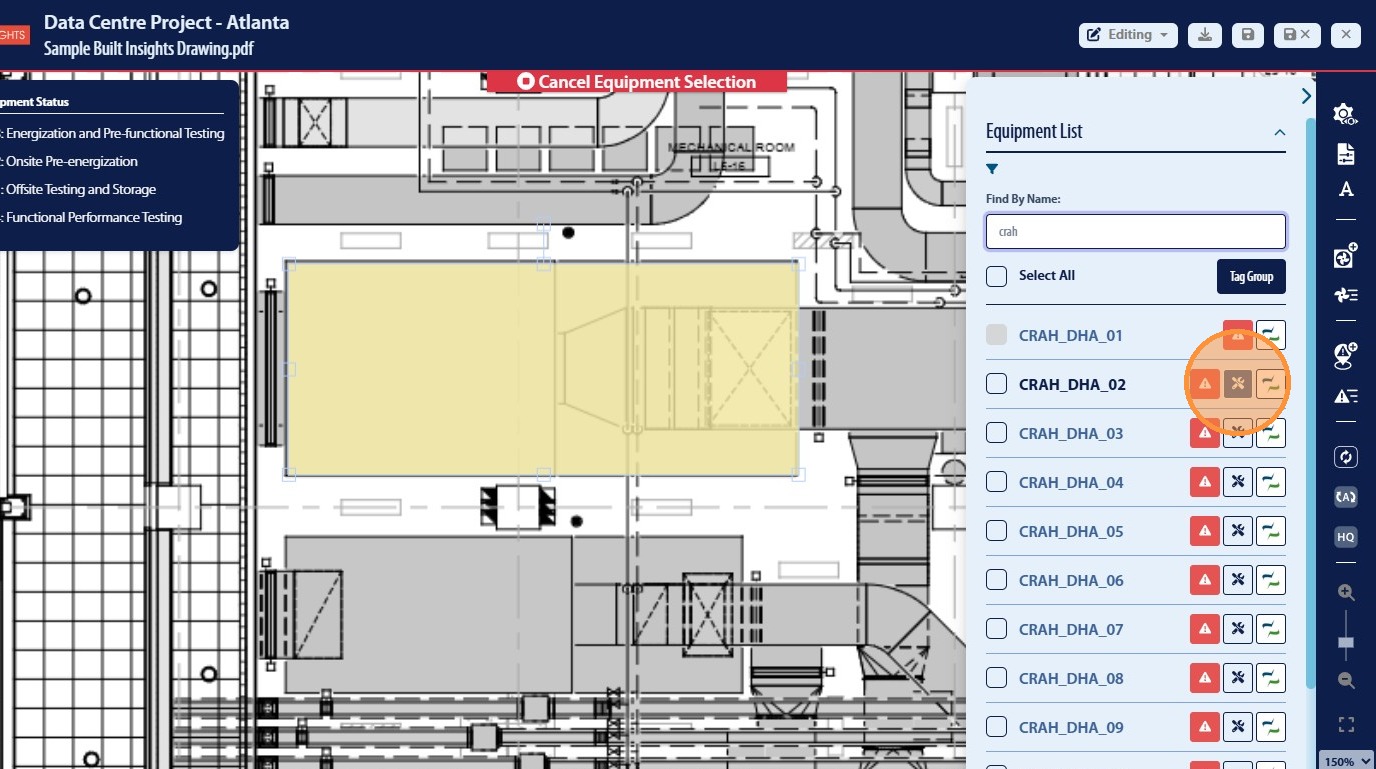
37. Once Add Equipment icon has been selected the user can then click anyone on the PDF document to add an rectangle that will represent a piece of equipment on the PDF
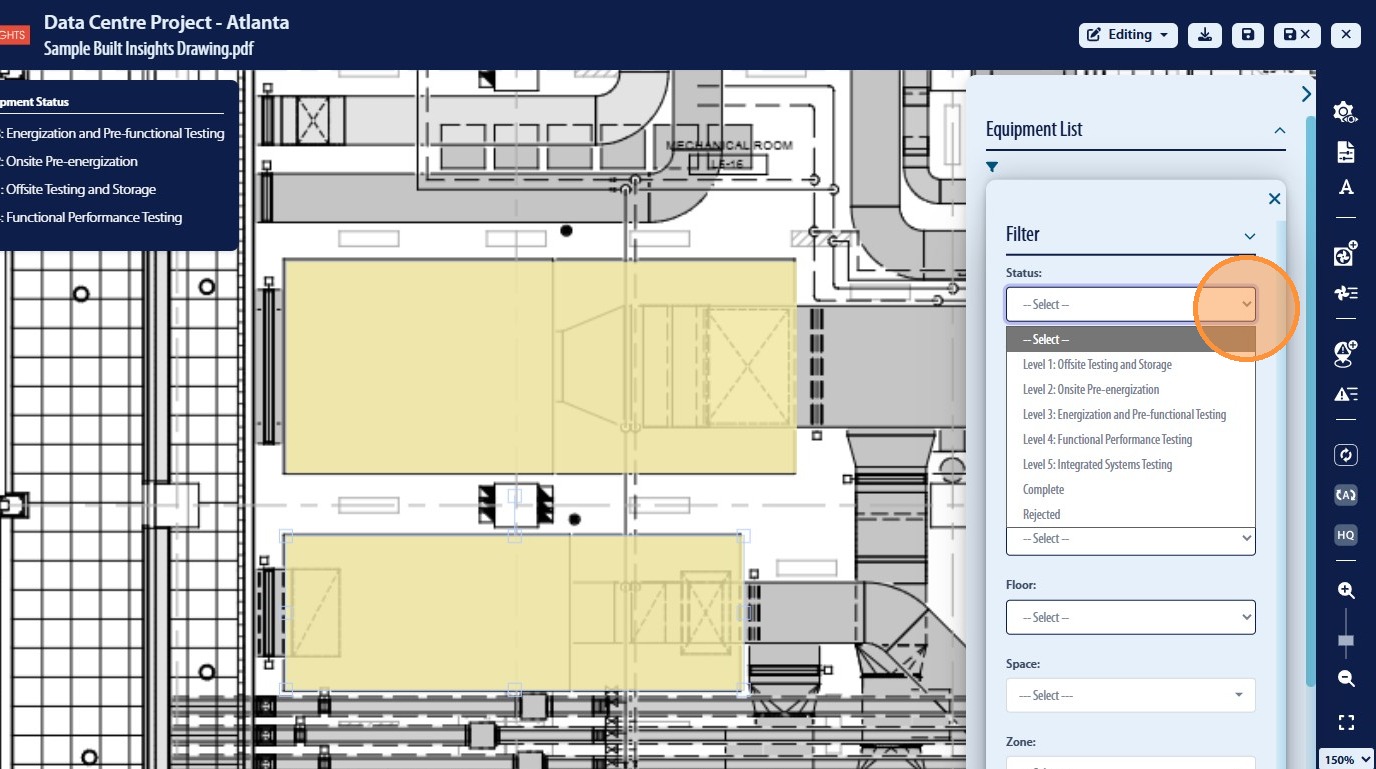
38. The equipment list can be filtered beyond the search bar by clicking the “Filter” icon
39. From here the user can select the associated items they will like to filter by and apply those
40. Once the user has selected the desired options to be associated with the Equipment List they will then be required to click “Apply”
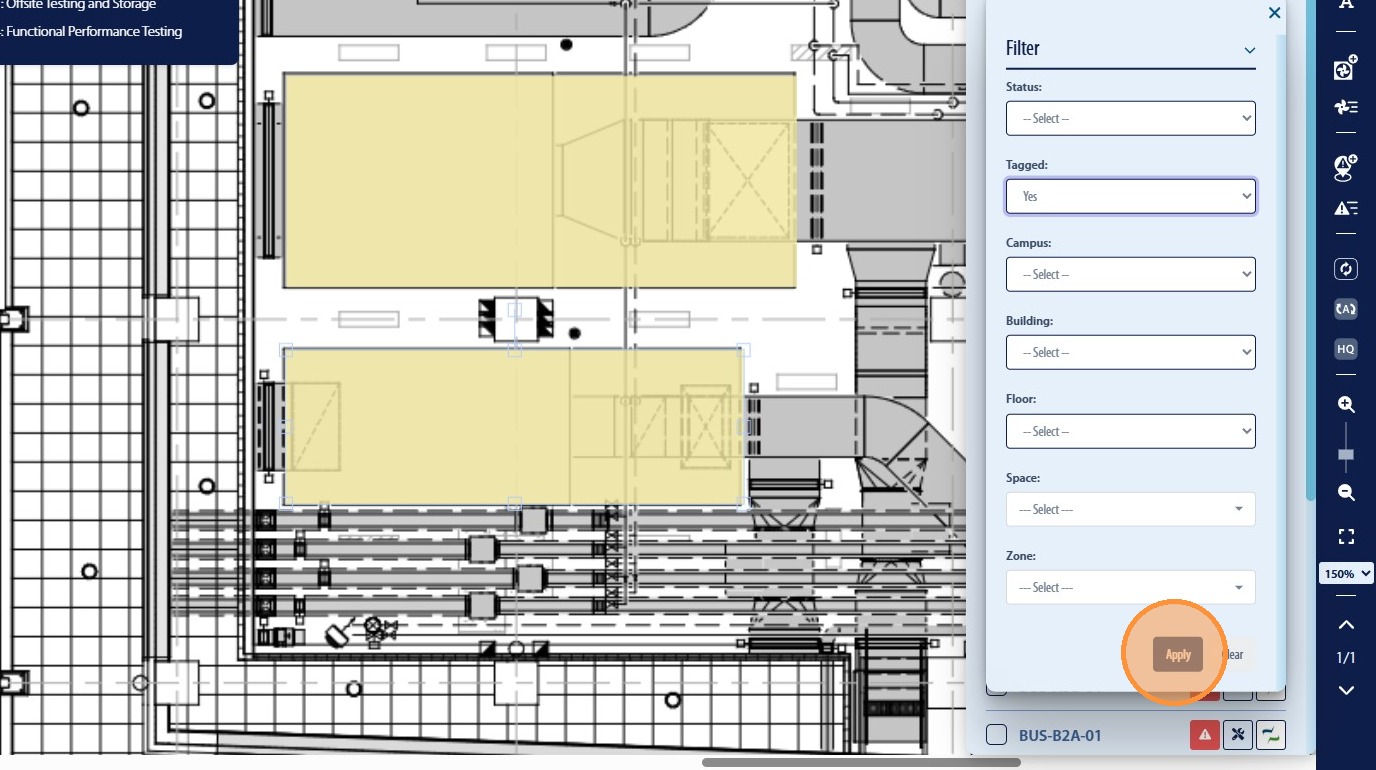
41. To remove associated filters the user can do this by clicking the “X” icon on the displayed filters

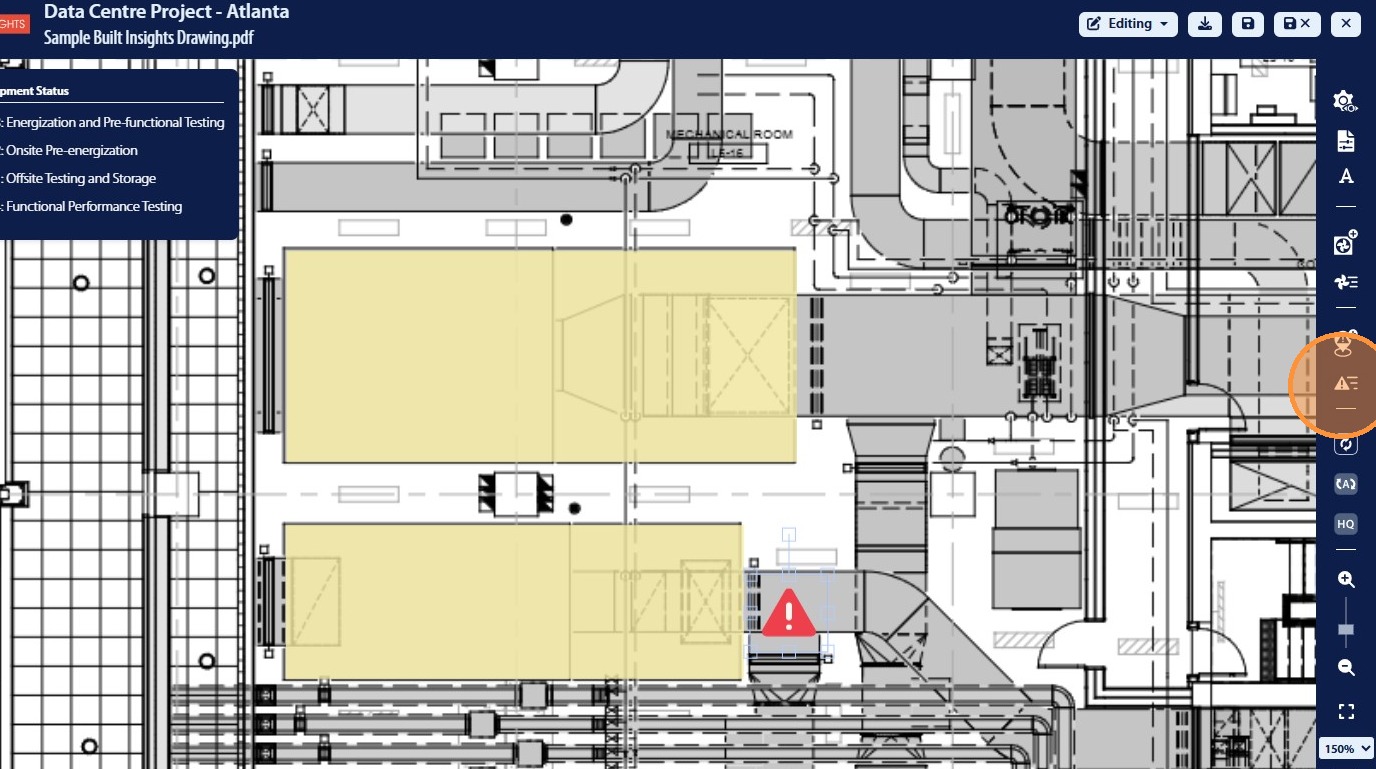
Adding Issues to PDF in Smart Mark-Ups
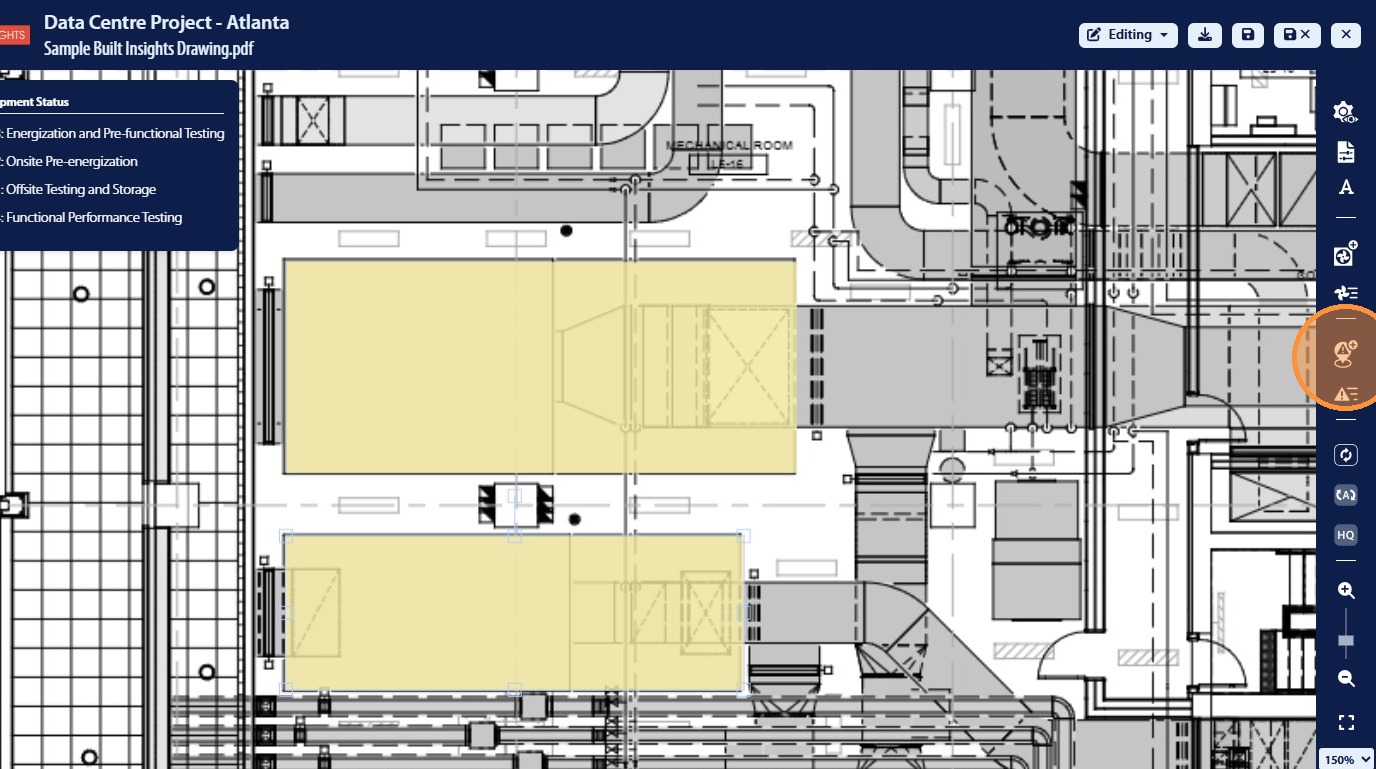
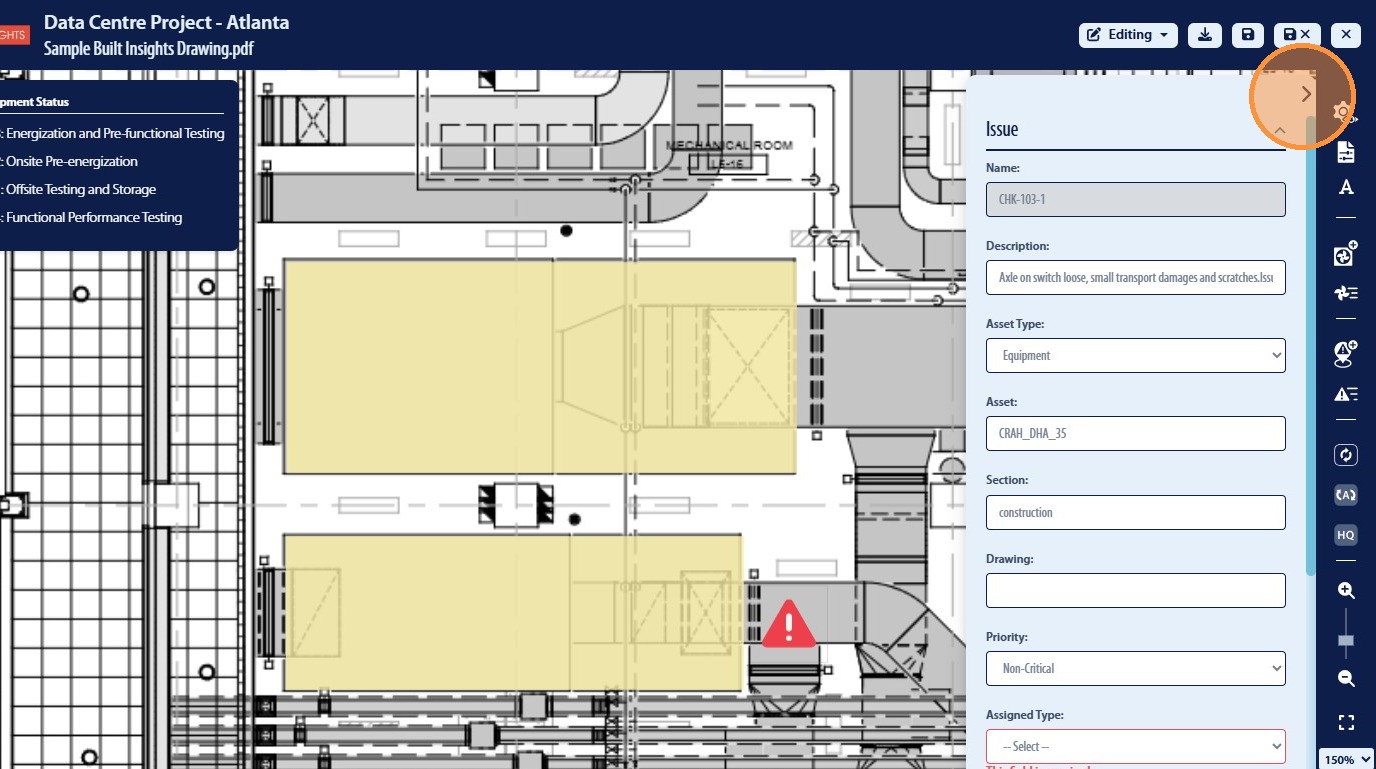
42. The user has the ability to identify new issues in the Smart Mark-Ups feature and send this data to CxAlloy using the “Add Issue” icon
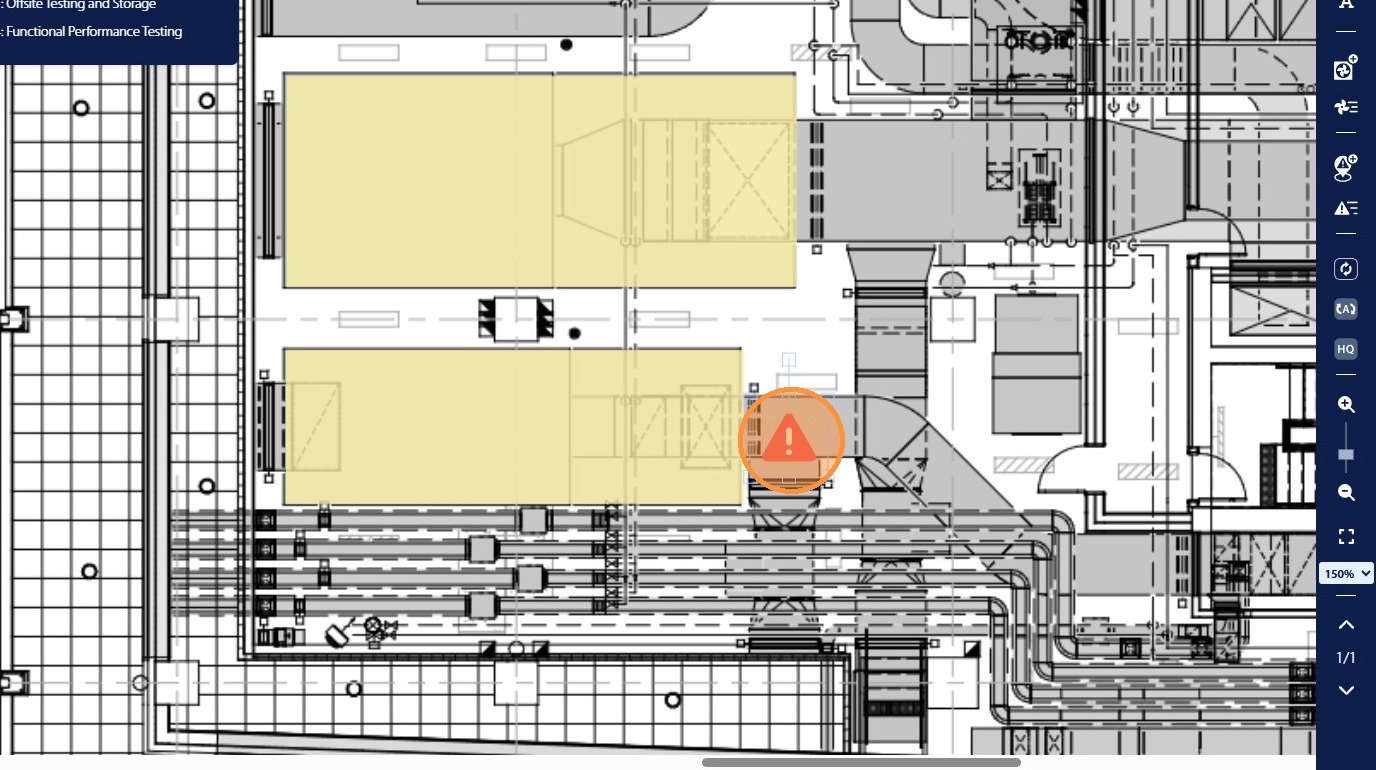
43. By selecting the icon the user can the select an locaiton on the PDF document where they want to display that issue

44. Once the issue is displayed on the PDF document the user can click the issue to add the associated information to be synchronized with CxAlloy
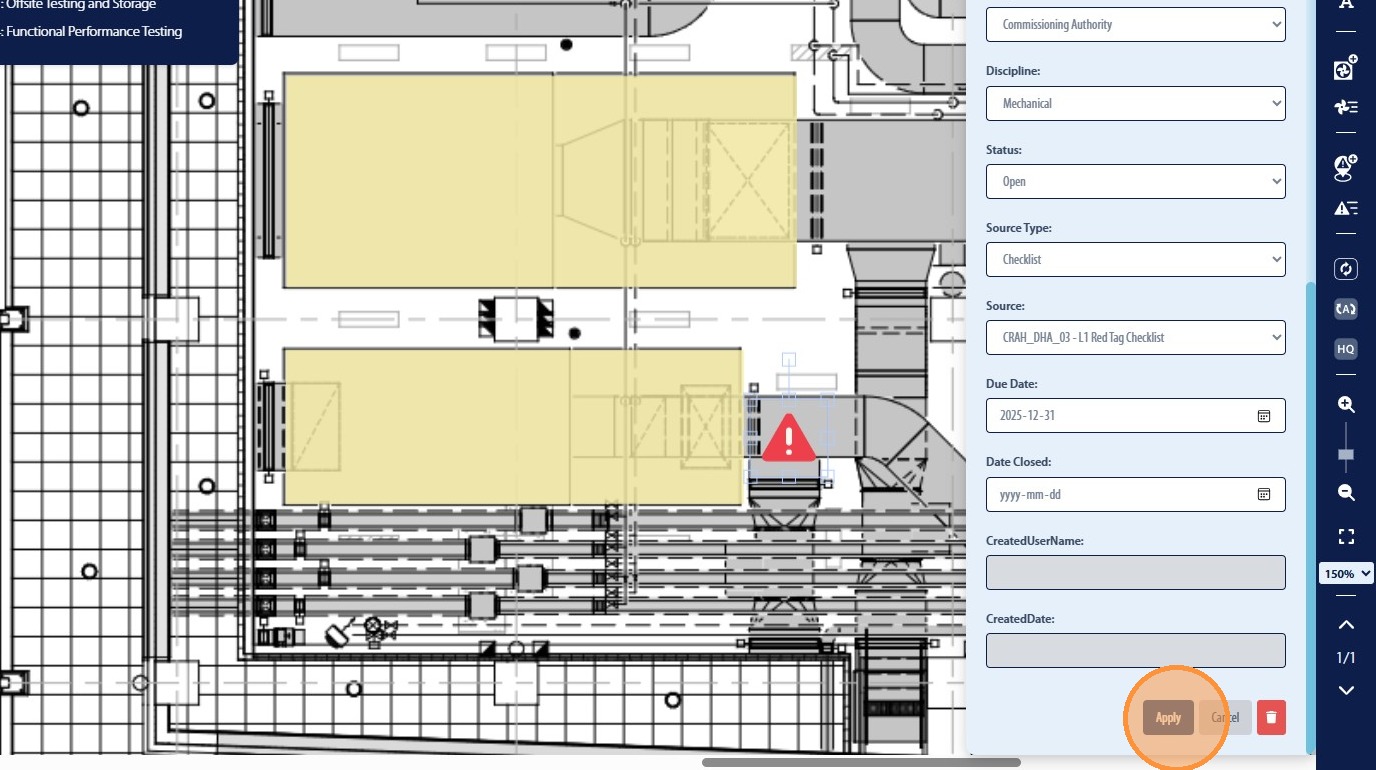
45. When a new issue is created in Smart Mark-Ups the user will be promted to type “Issue Name” into the text box for tracking in Built Insights only

46. Type the “Description” into the text box provided for how this will be displayed in CxAlloy and Built Insights
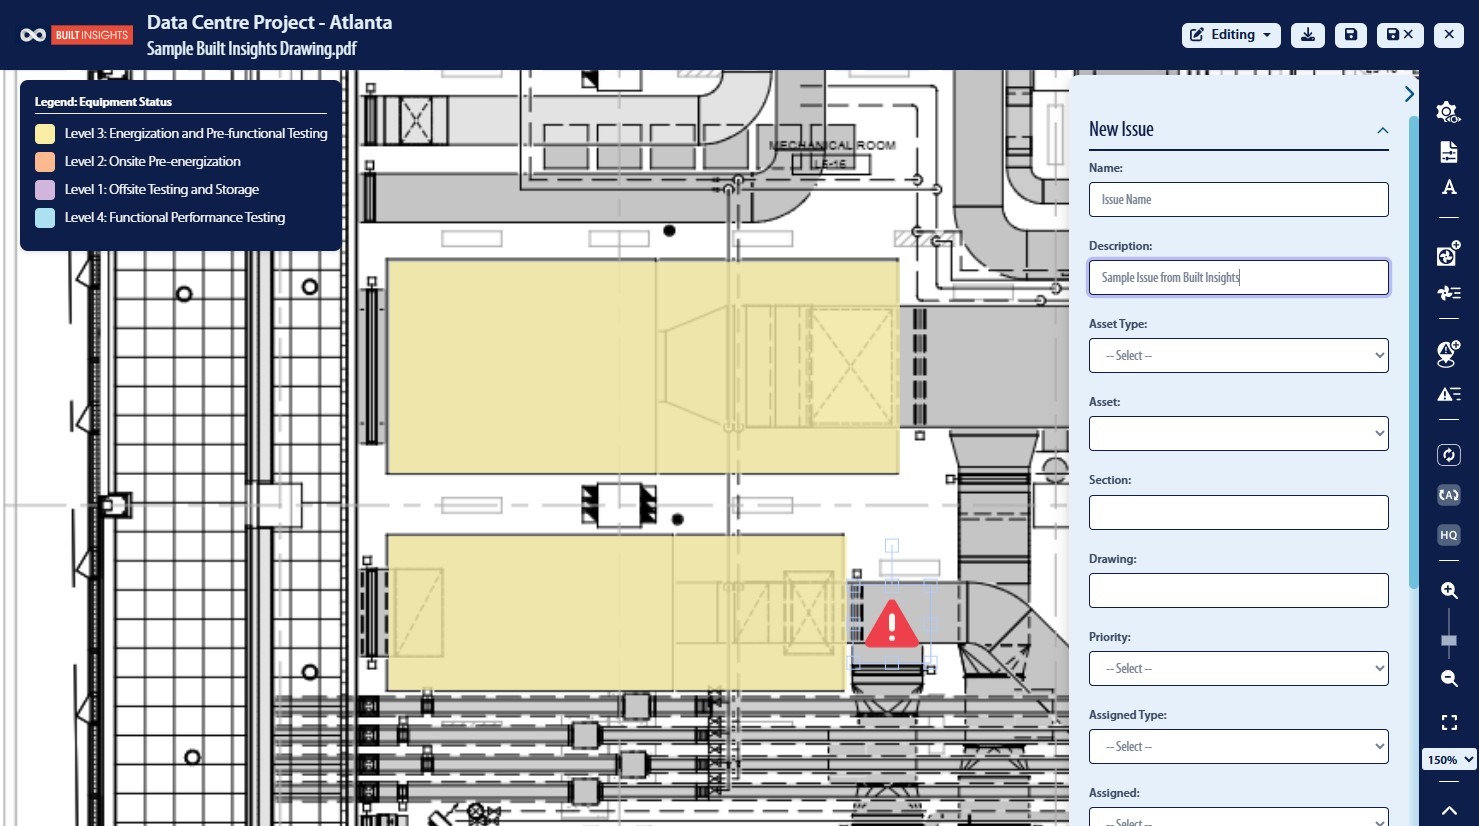
47. Select the “Asset Type” option to assign the issue against a specific asset in CxAlloy
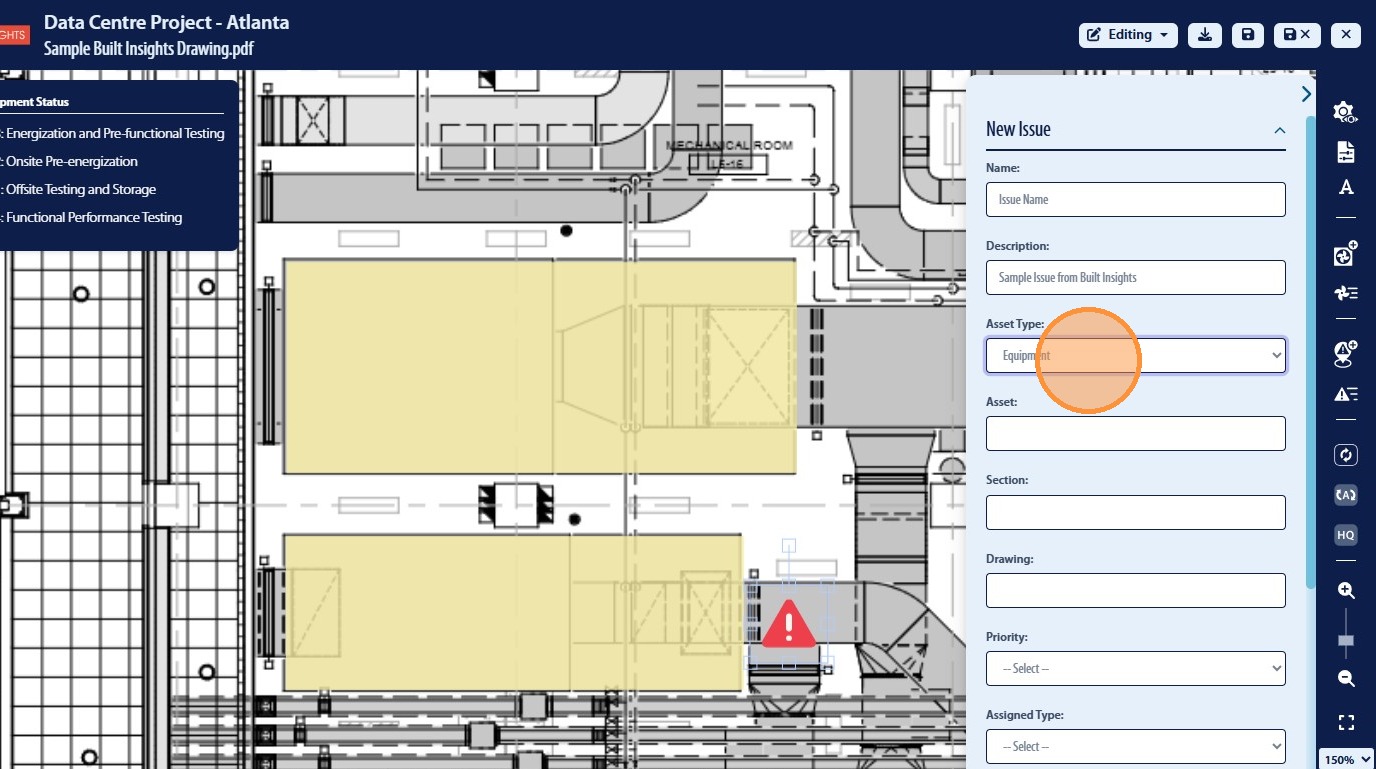
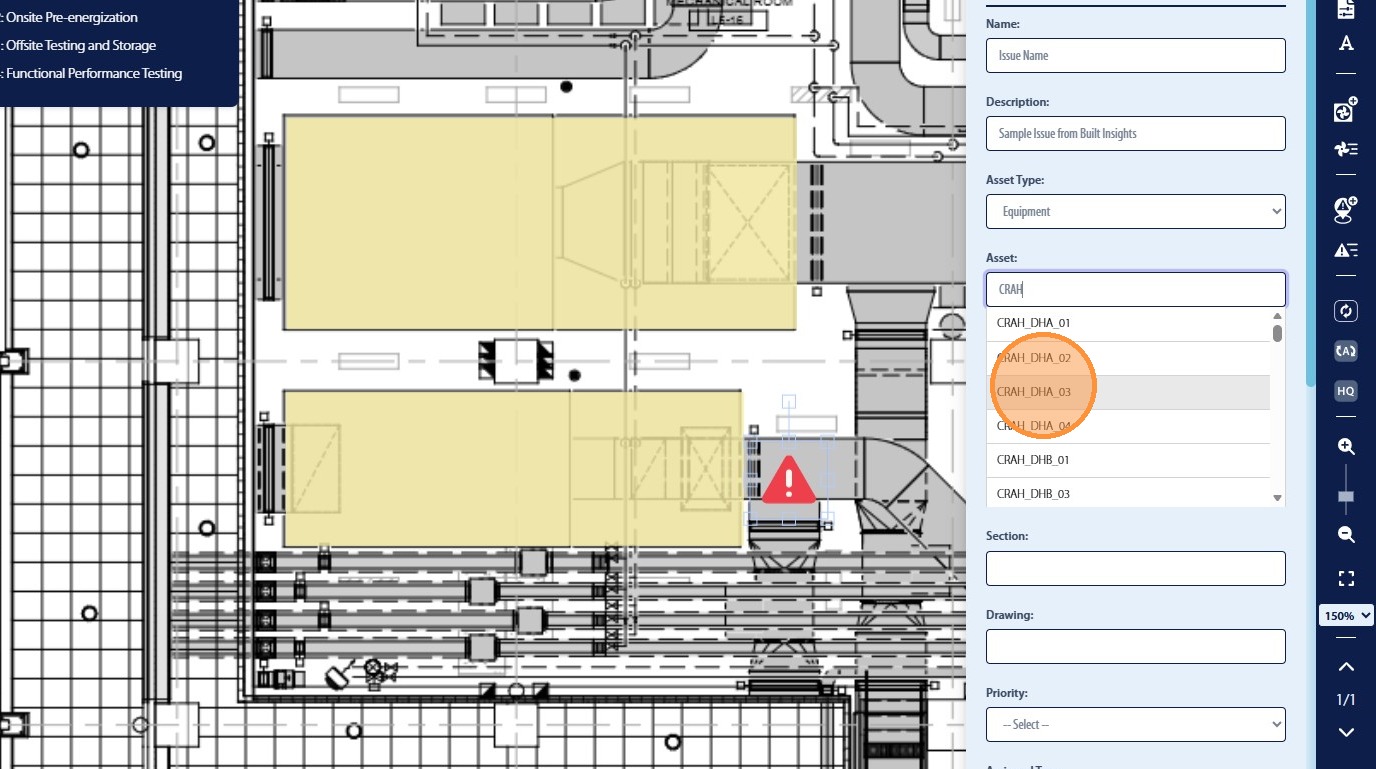
48. The user can type in the search field to select a specific asset
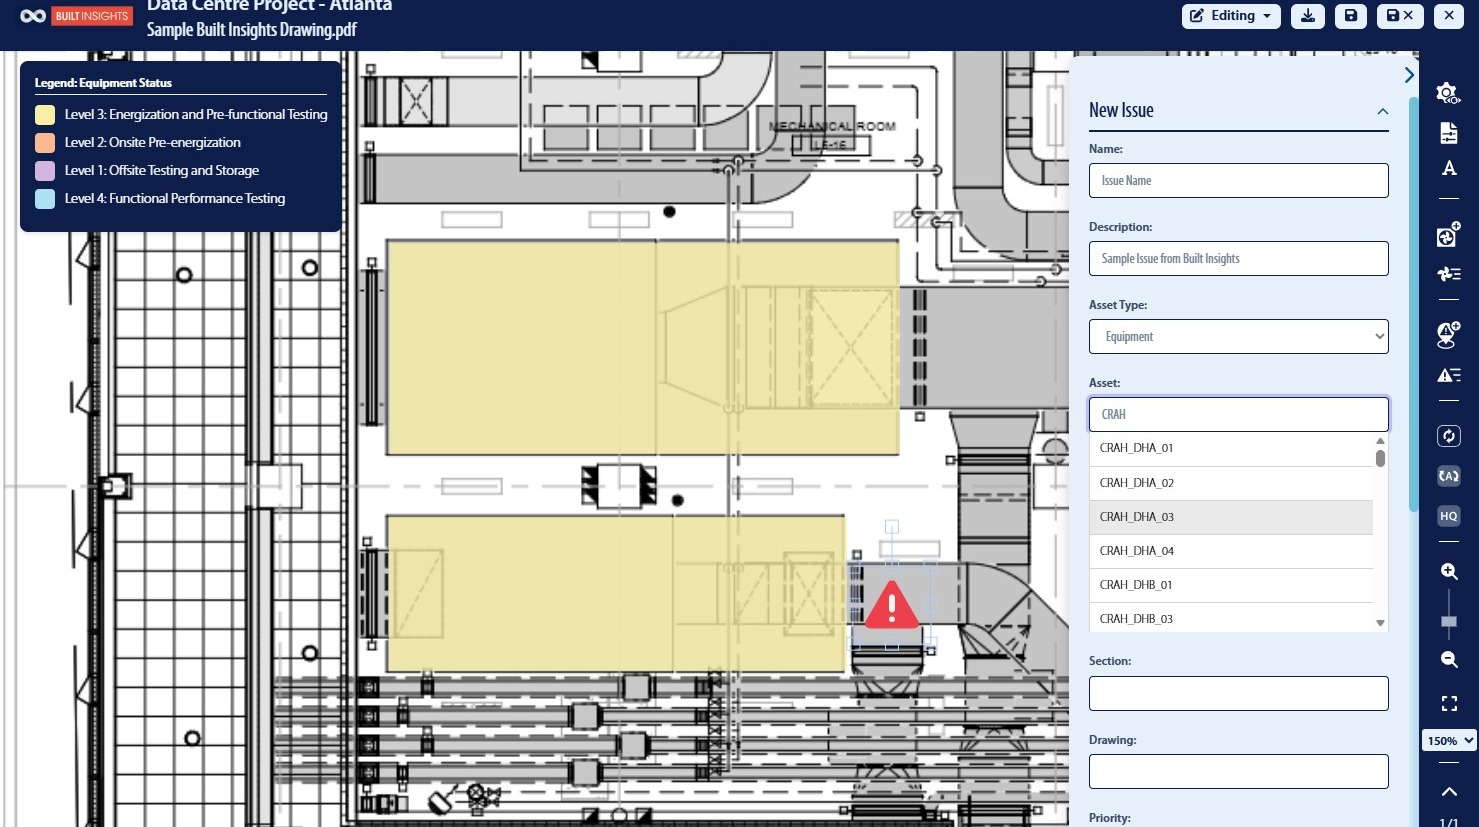
49. Selected the associated Asset from the list provided based on project data
50. Select the “Priority” option.

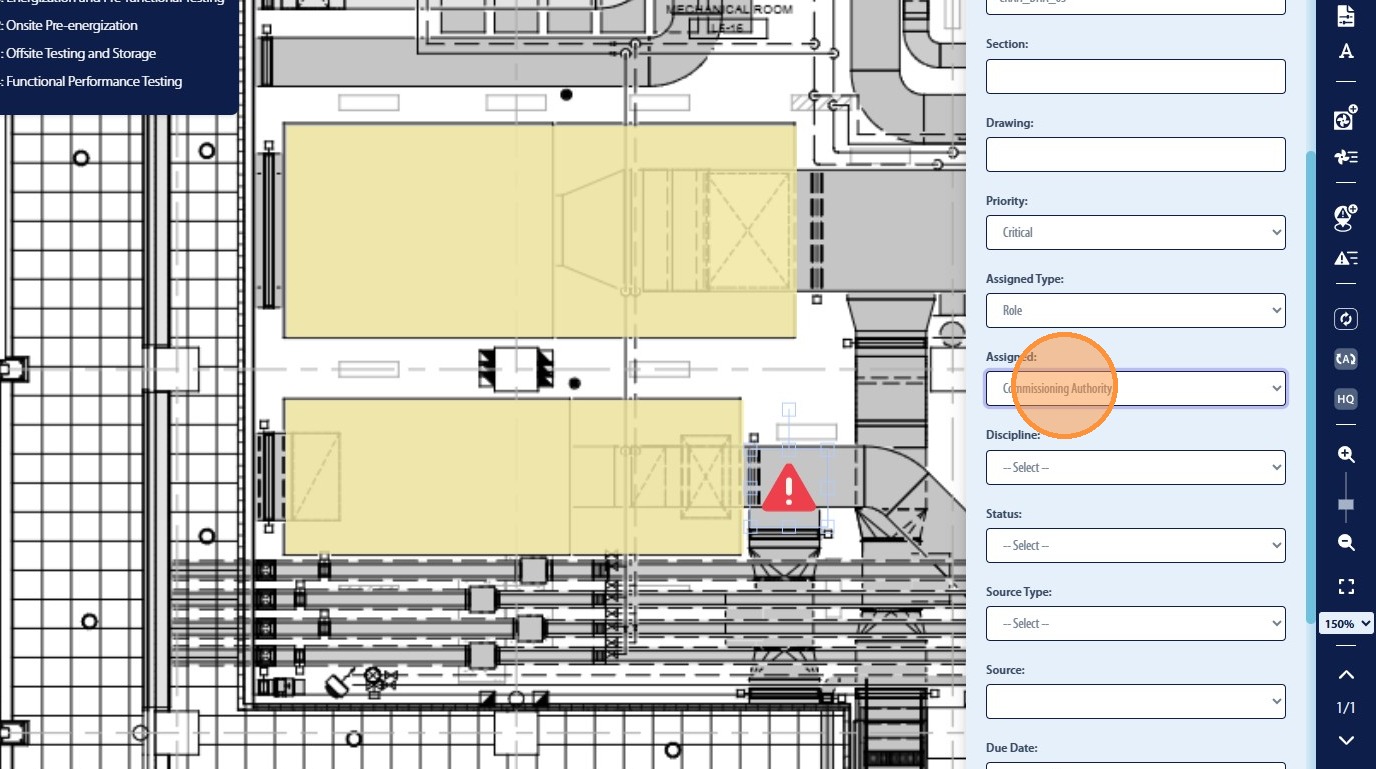
51. Select the “Assigned Type” option.

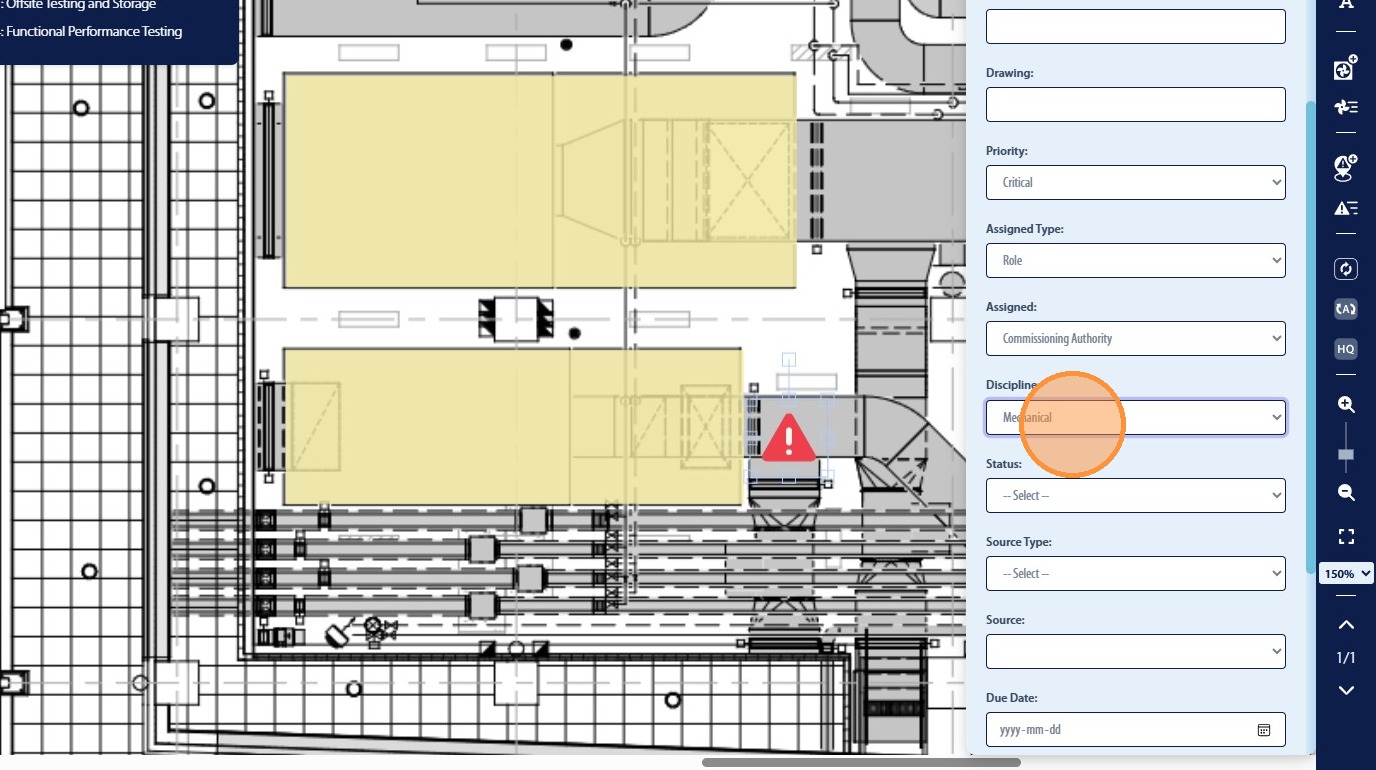
52. Select the “Assignee” option.
53. Select the “Discipline” option.
54. Select the “Issue Status” option.
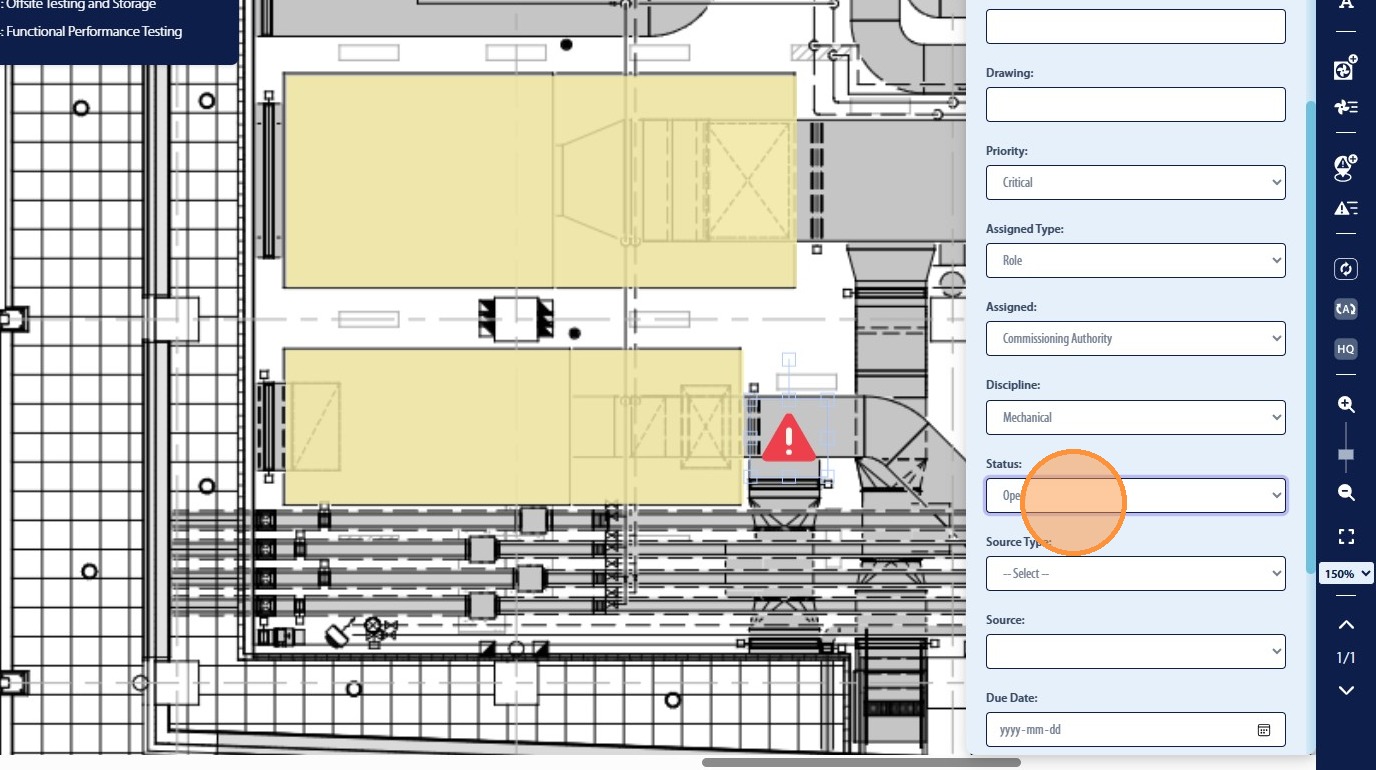
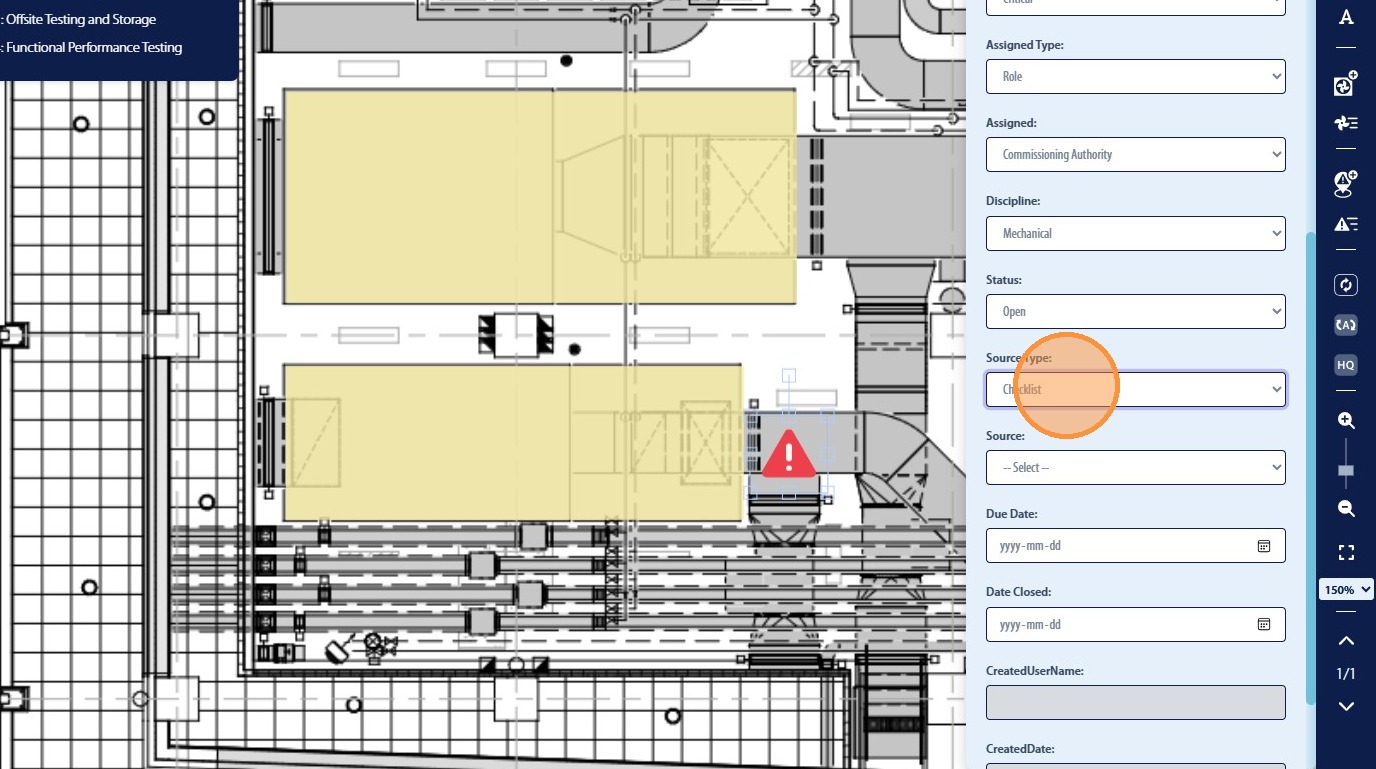
55. Select the “Source Type” option.
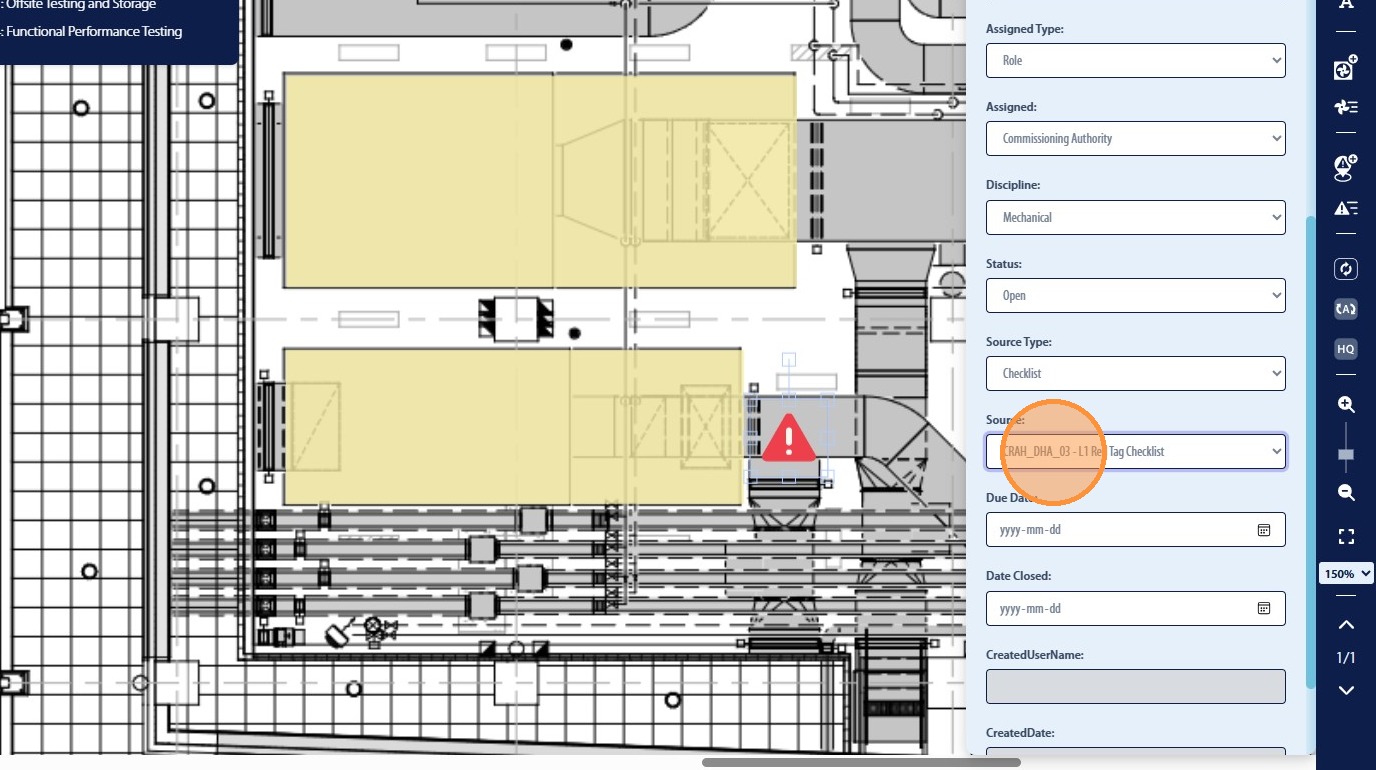
56. Select the associated source from the options provided
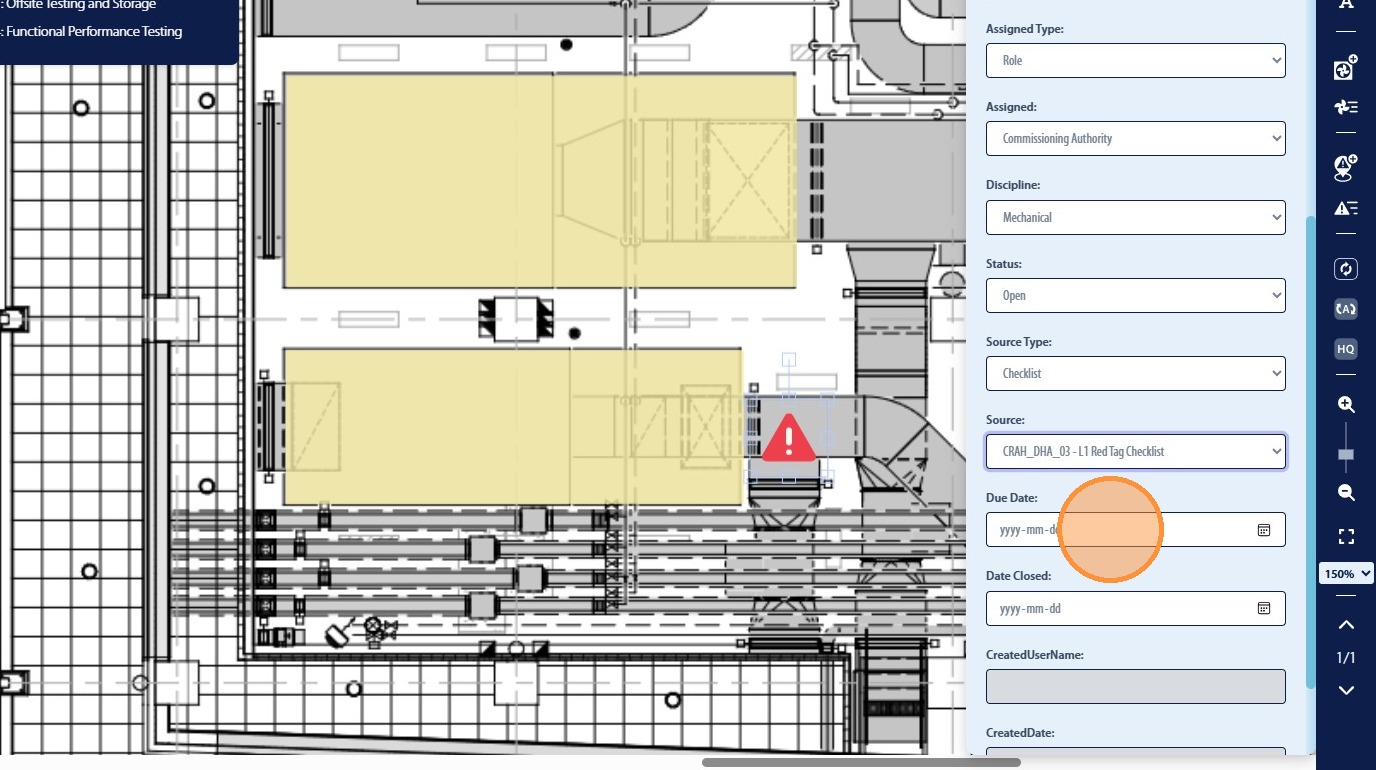
57. Click this date field to apply a “Due Date” for the issue
58. Once the user has selected the desired options to be associated with the new Issue they will then be required to click “Apply”
Snagging Issues on PDF in Smart Mark-Ups
59. The user also has the ability to access all issues for the project by clicking the “Issue List” icon
60. The user can also tag issues from the “Issue List” on the PDF document by clicking the associated issue
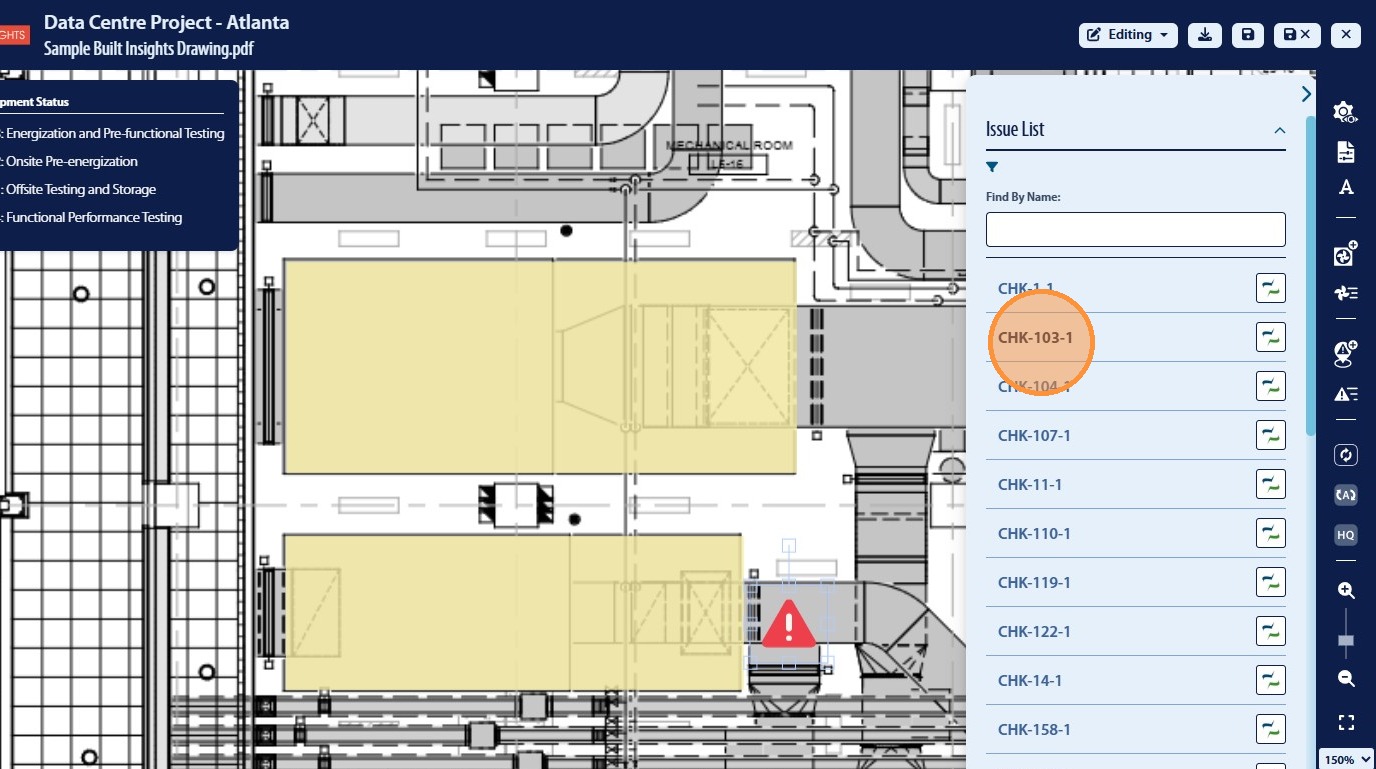
61. The user will then be able to select a location on the PDF where the issue will be placed
62. The issue data will then be displayed in the Right Hand panel
Saving and Downloading PDF Documents
63. Once updates have been made the user can save the PDF document using the “Save” icon in the top right
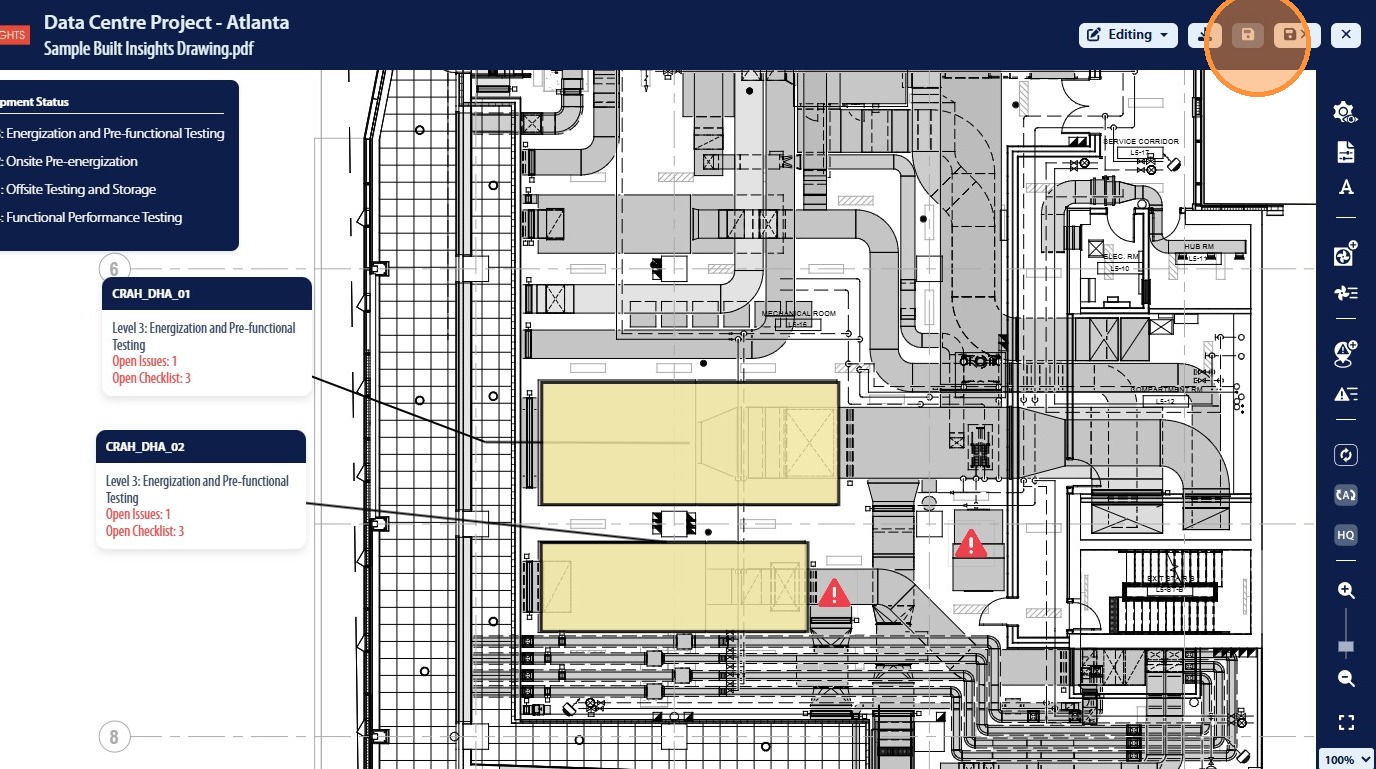
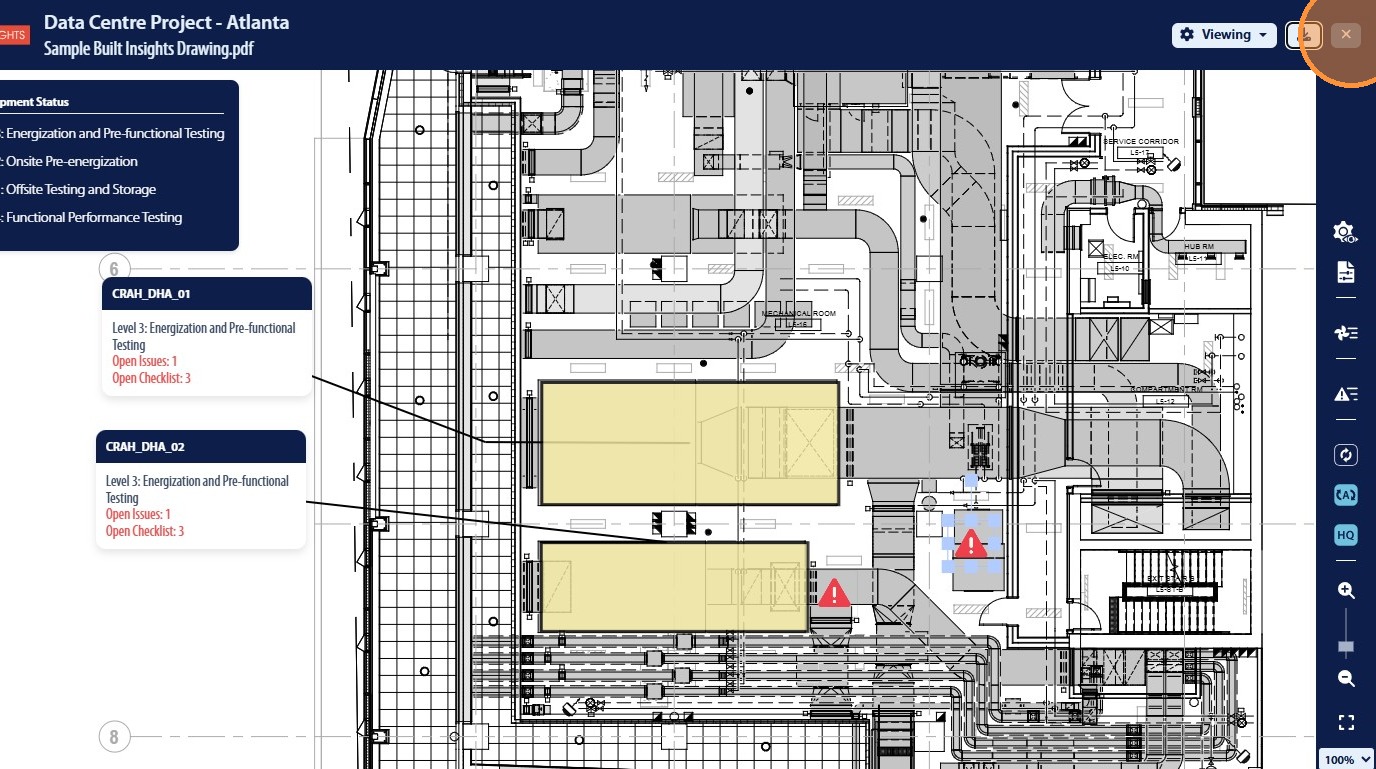
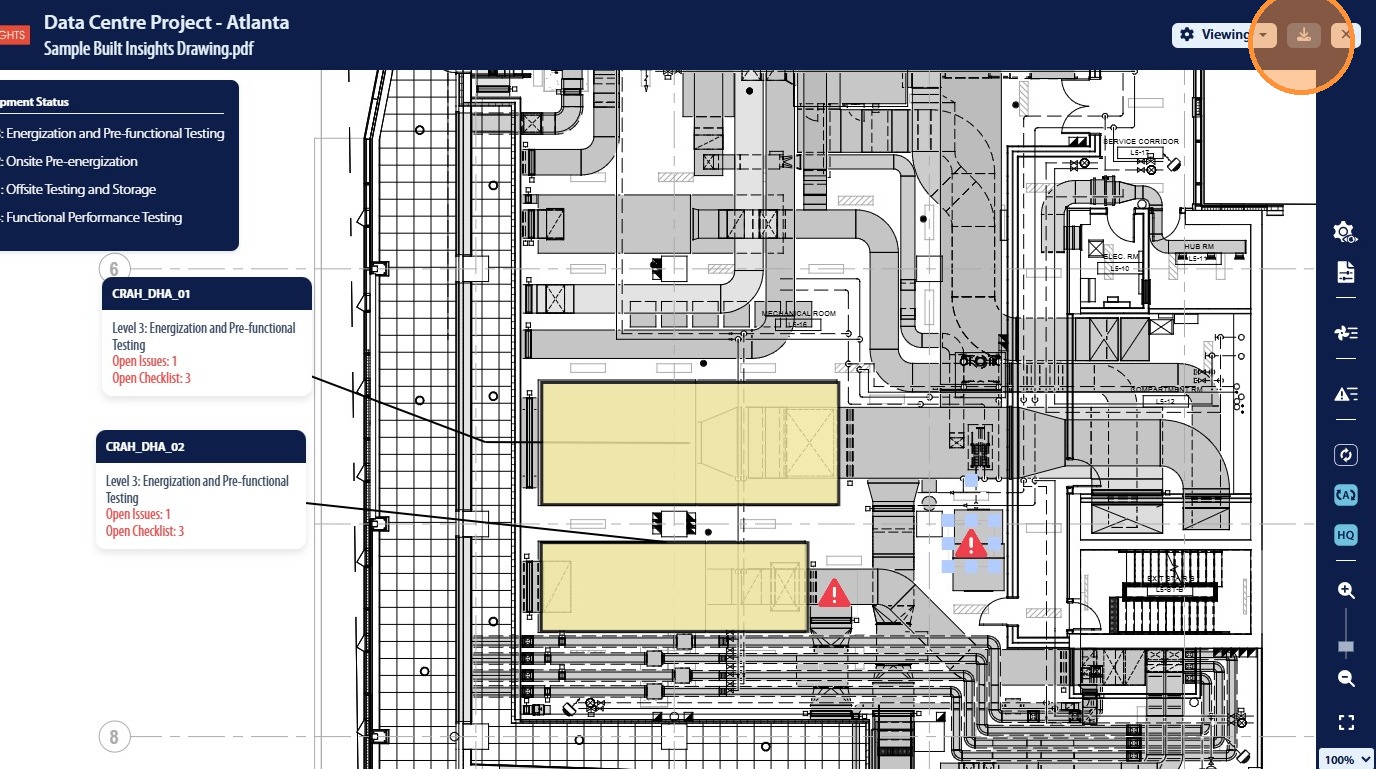
64. Click “Viewing” to check-in the document providing access to other users

65. The PDF Document has be downloaded as a PDF document using the “Download” button in the top right
66. The user can close the document by clicking the “X” icon in the top right